INSTRUCTIONS EVPE TESLA SHIMS
EVPE Camber Shim Kit install instructions
This is a DIY overview. If you don’t know how to work on cars, please ask a shop to do the install. With the right tools and some mechanical knowledge, this is a one to three hour job in your garage on jack stands. An alignment shop should realistically only charge you one or two hours labor if you go that route.
Use all possible safety precautions if you are doing the install yourself. We take no responsibility if you damage your car or yourself during the install.
STEPS
- Place the vehicle into minimum height necessary to get a jack underneath
- Place the vehicle into JACK MODE
- Raise one rear wheel off the ground with a jack using Tesla approved jack points - a jack puck helps prevent damage to the vehicle
- Support the weight of the vehicle with something in addition to the jack (jacks fail from time to time)
- Remove the wheel
- Take note of the upper aft link (1 finger) upper fore link (2 fingers) and the toe link (3 fingers) in the first photo - the shims will be installed between the aft link and the frame
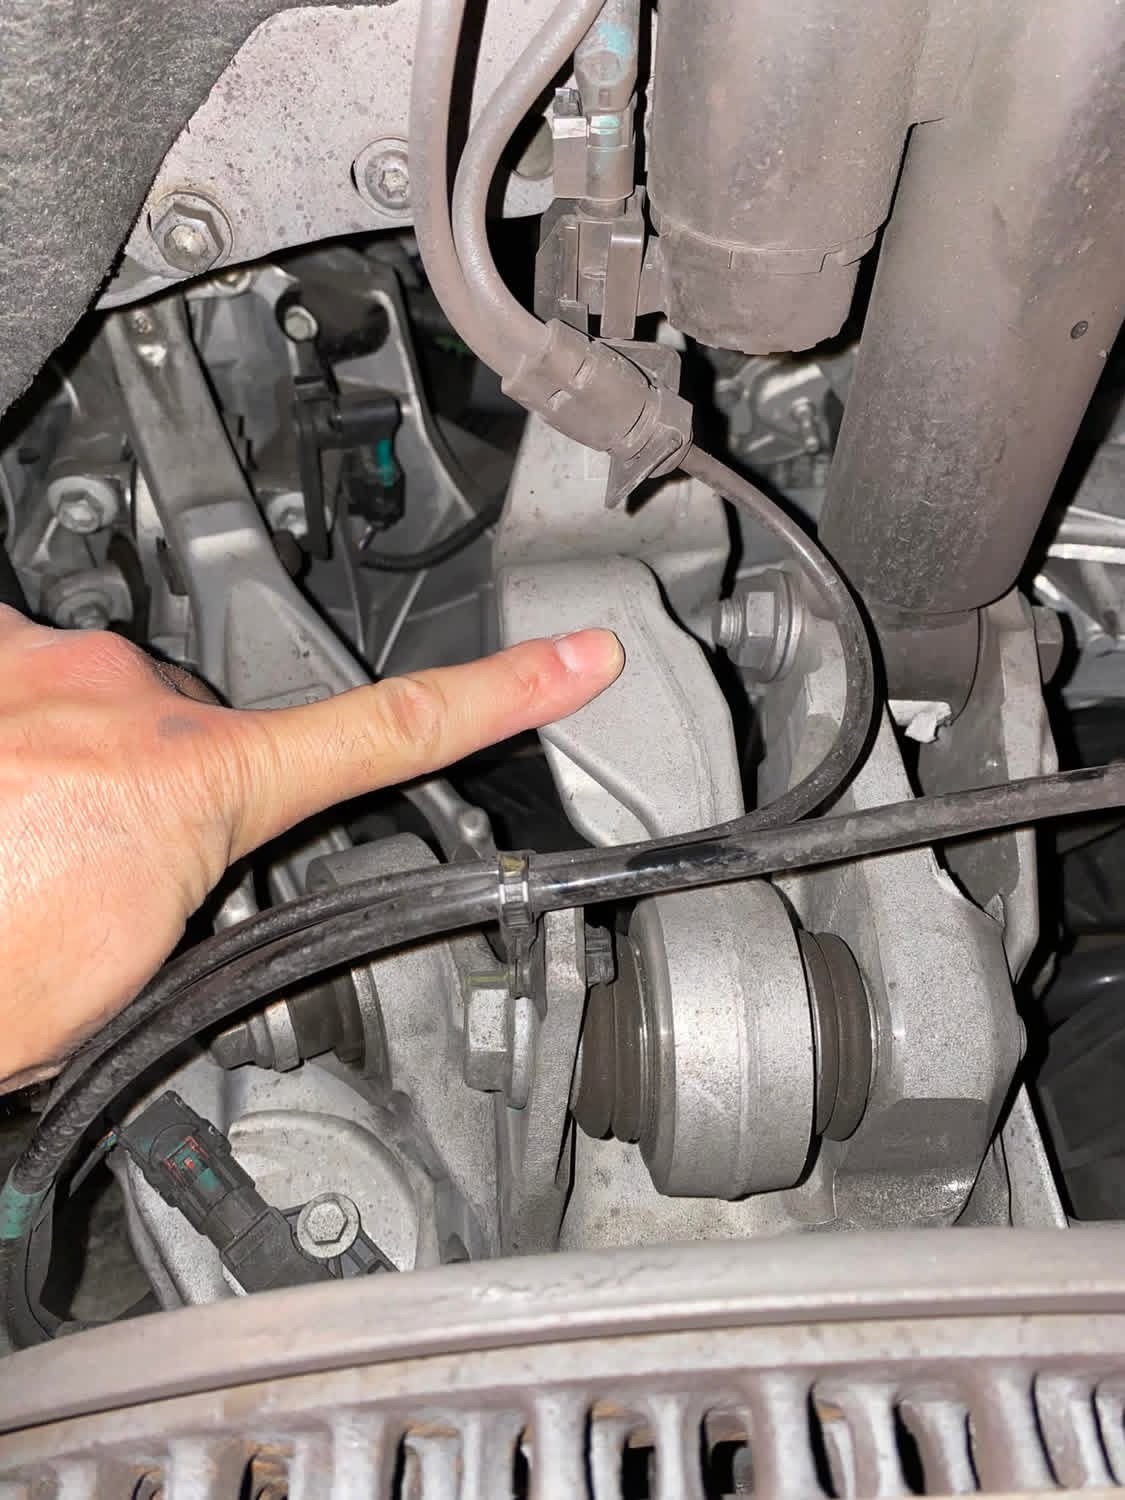
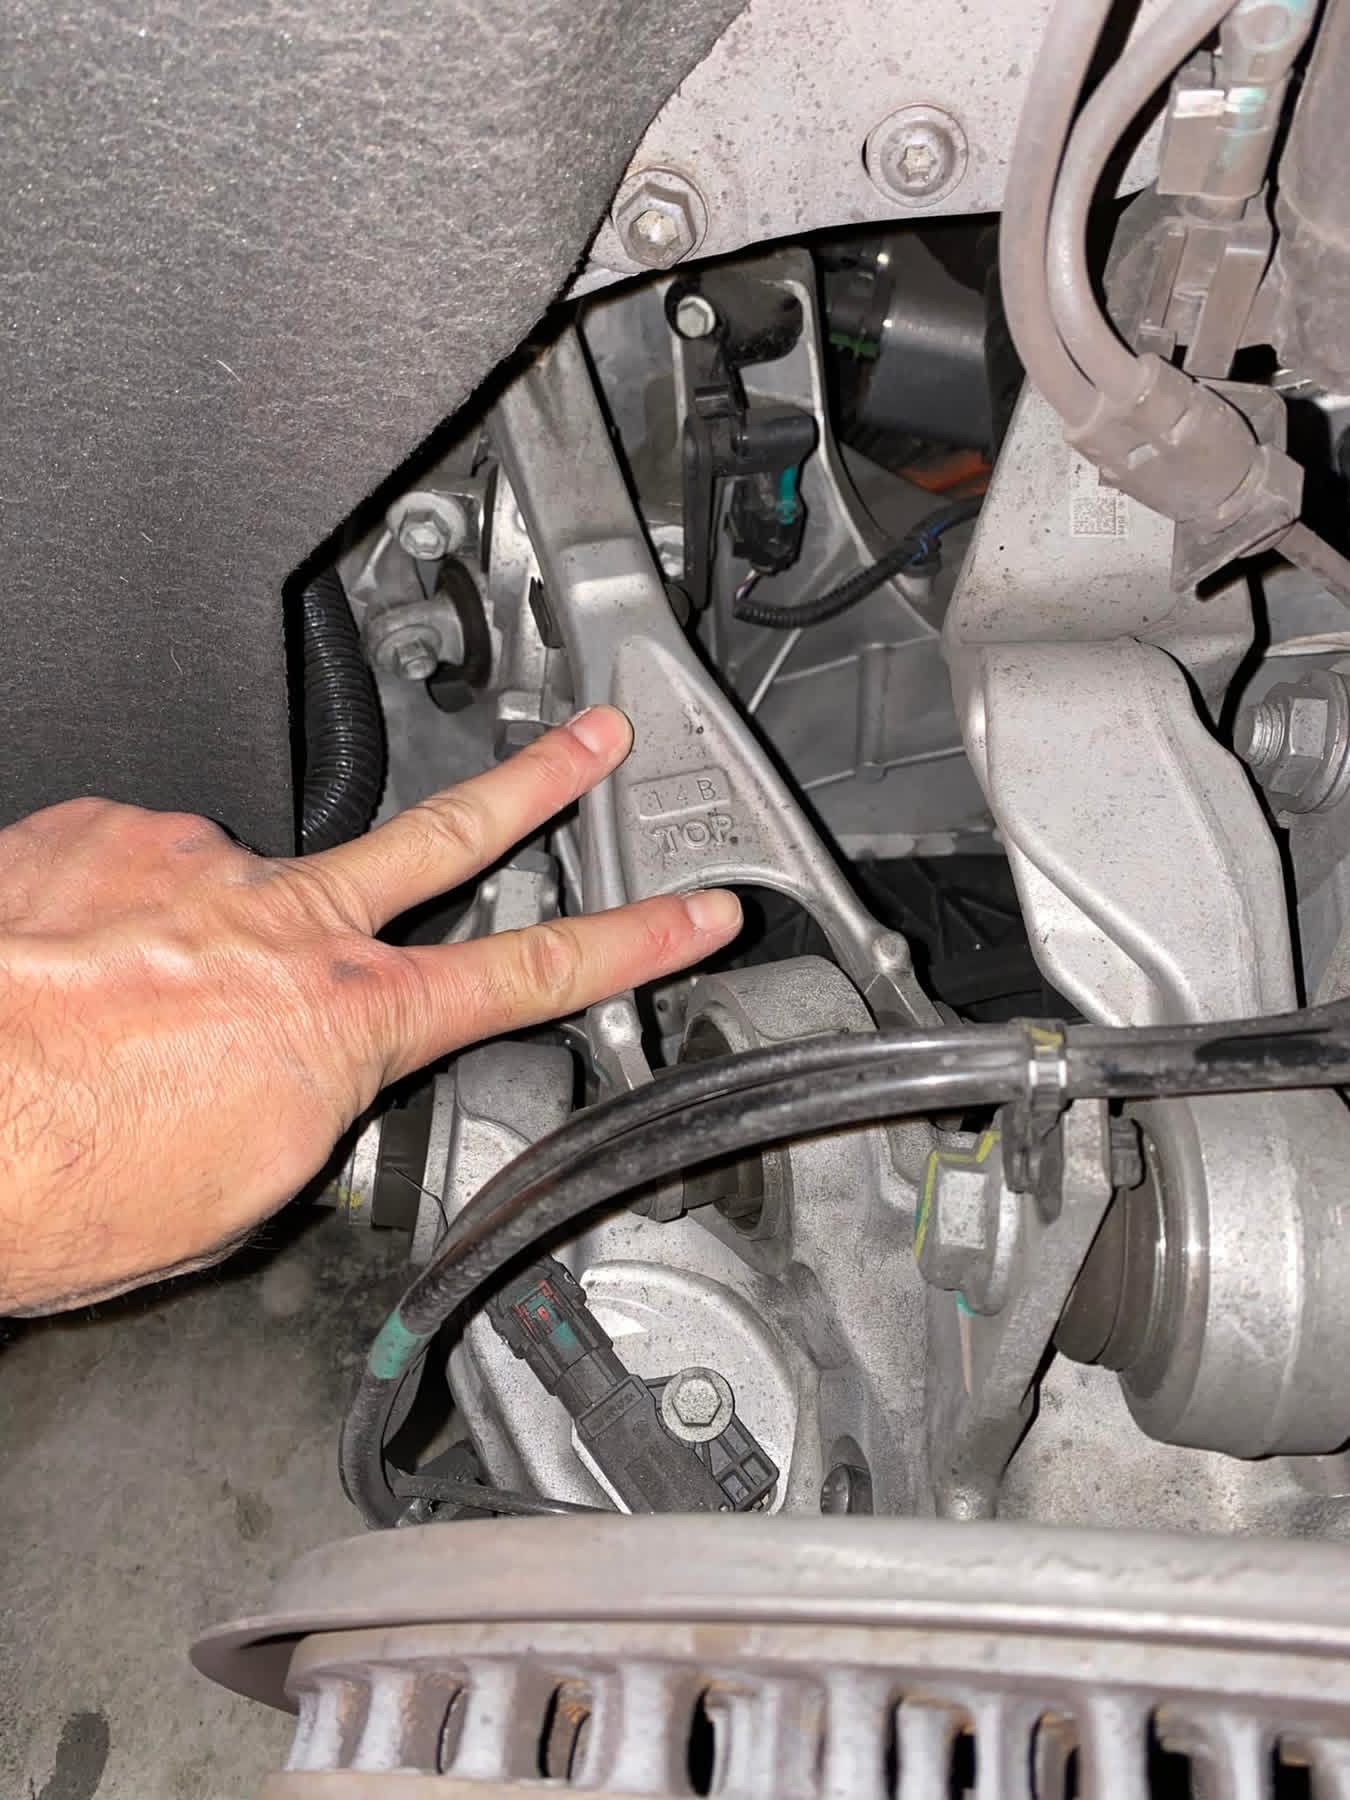
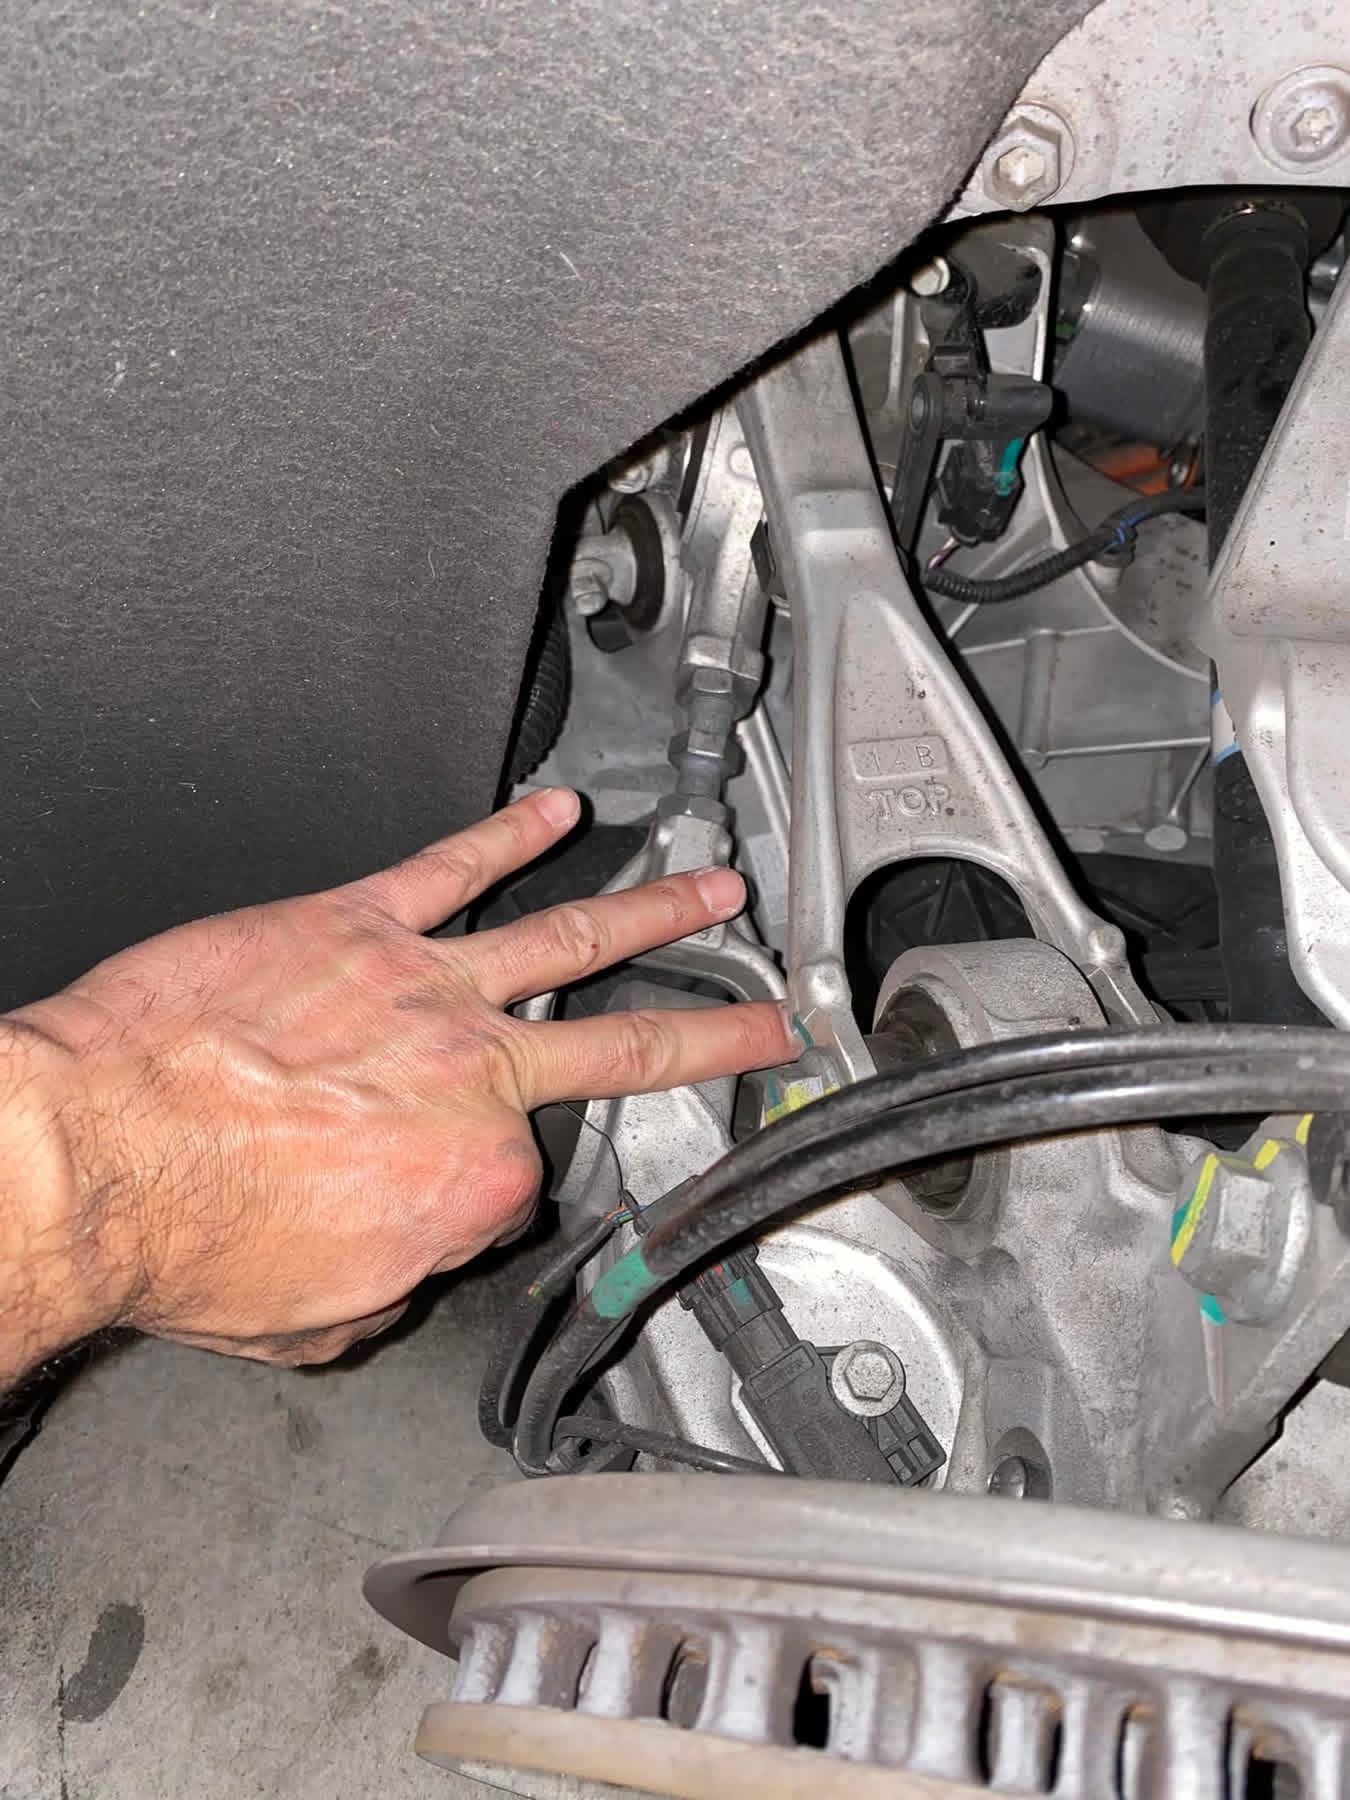
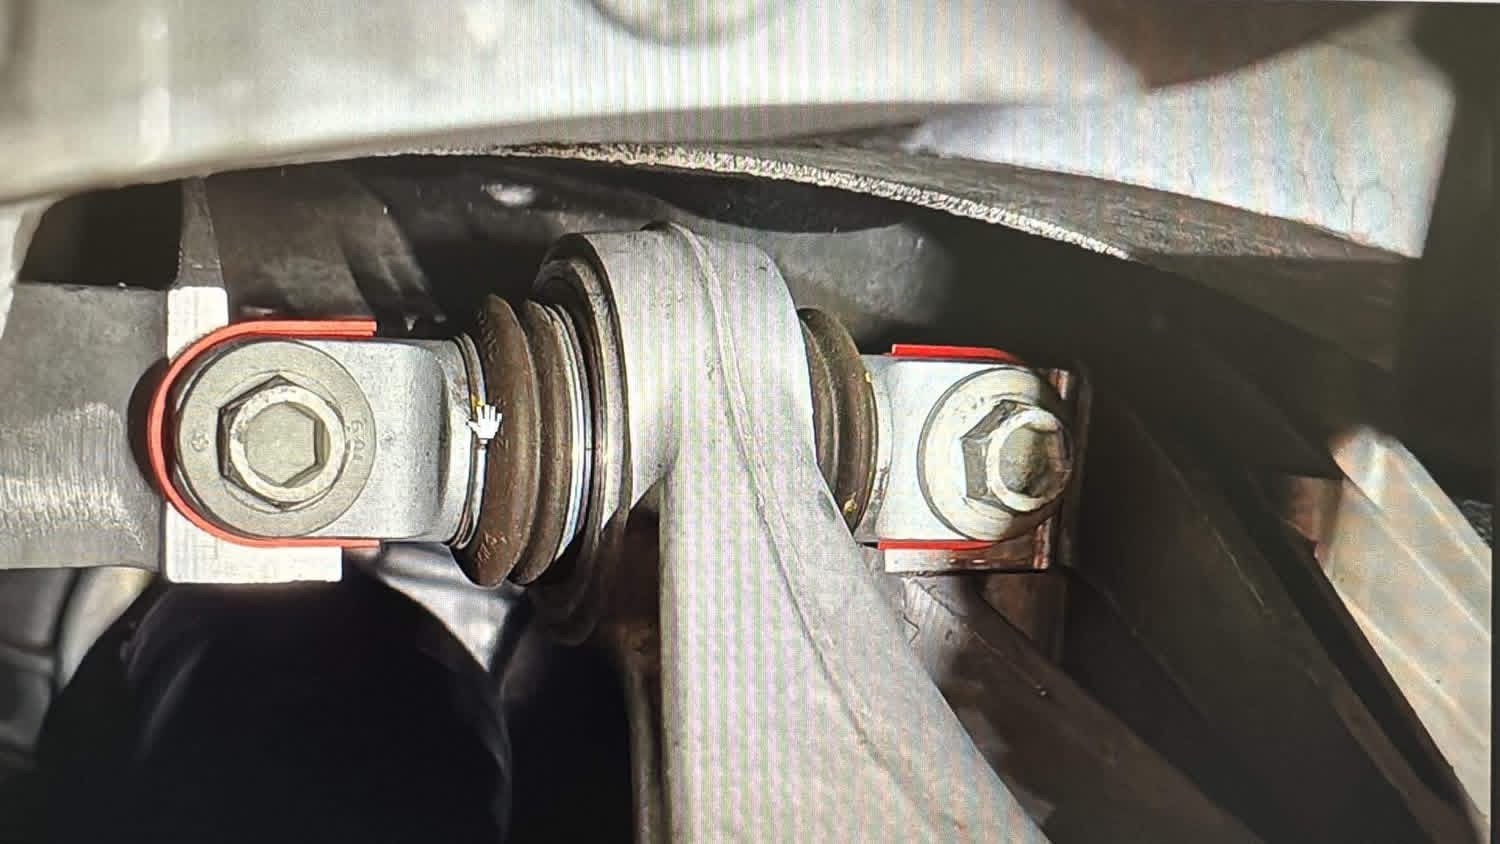
- Loosen but DO NOT completely remove the frame side bolts for these three links (if you remove the bolts, the ears for the frame side of each link will rotate, and it will be a PITA to line them up again
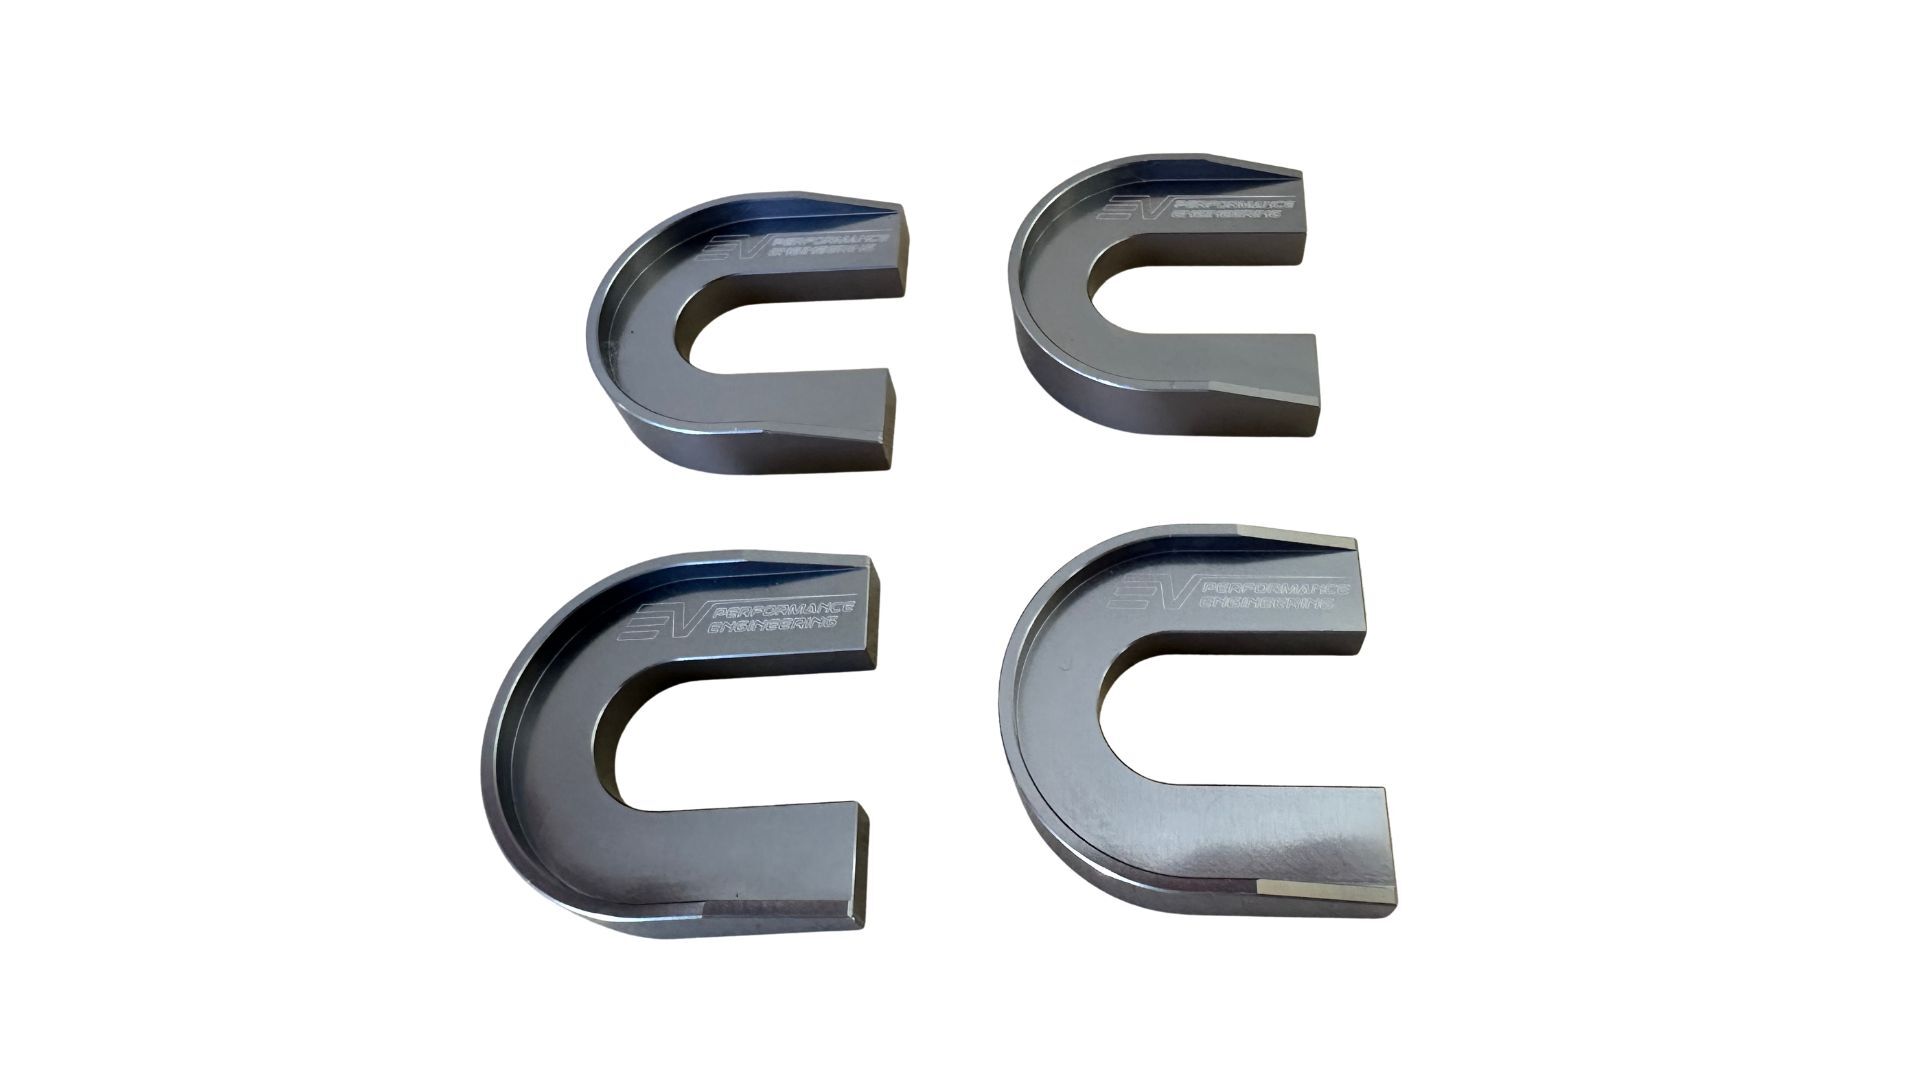
- Slide one camber shim between each of the ears of the aft link and the frame (2 per side of vehicle). The flat side of the shims go toward the frame. The protrusions on the perimeter of the shims are meant to hold them against the ears of link and keep the shims from rotating
- Tighten each of the 6 previously loosened bolts to 63 ft lbs - it may be helpful to use a jack to compress the suspension while tightening
- Double check that the 6 bolts are tightened to spec
- Mount wheel
- Lower vehicleEVPE INSTRUCTIONS
- Repeat on other side
If you purchased the Black Shims - after step 9, keep the suspension compressed with the jack and remove/replace one factory bolt to aftermarket bolt at a time. This should keep the ears of the link from rotating. Alternatively, remove only the two bolts from the aft link during step 7 and replace them with the aftermarket bolts while the factory bolts for the fire link and toe link are loose to allow from movement and adjustment in the aft link.