HOW TO BOOST LEAK TEST
BOOST LEAK TESTING 101
Write-up by Dave Fathy
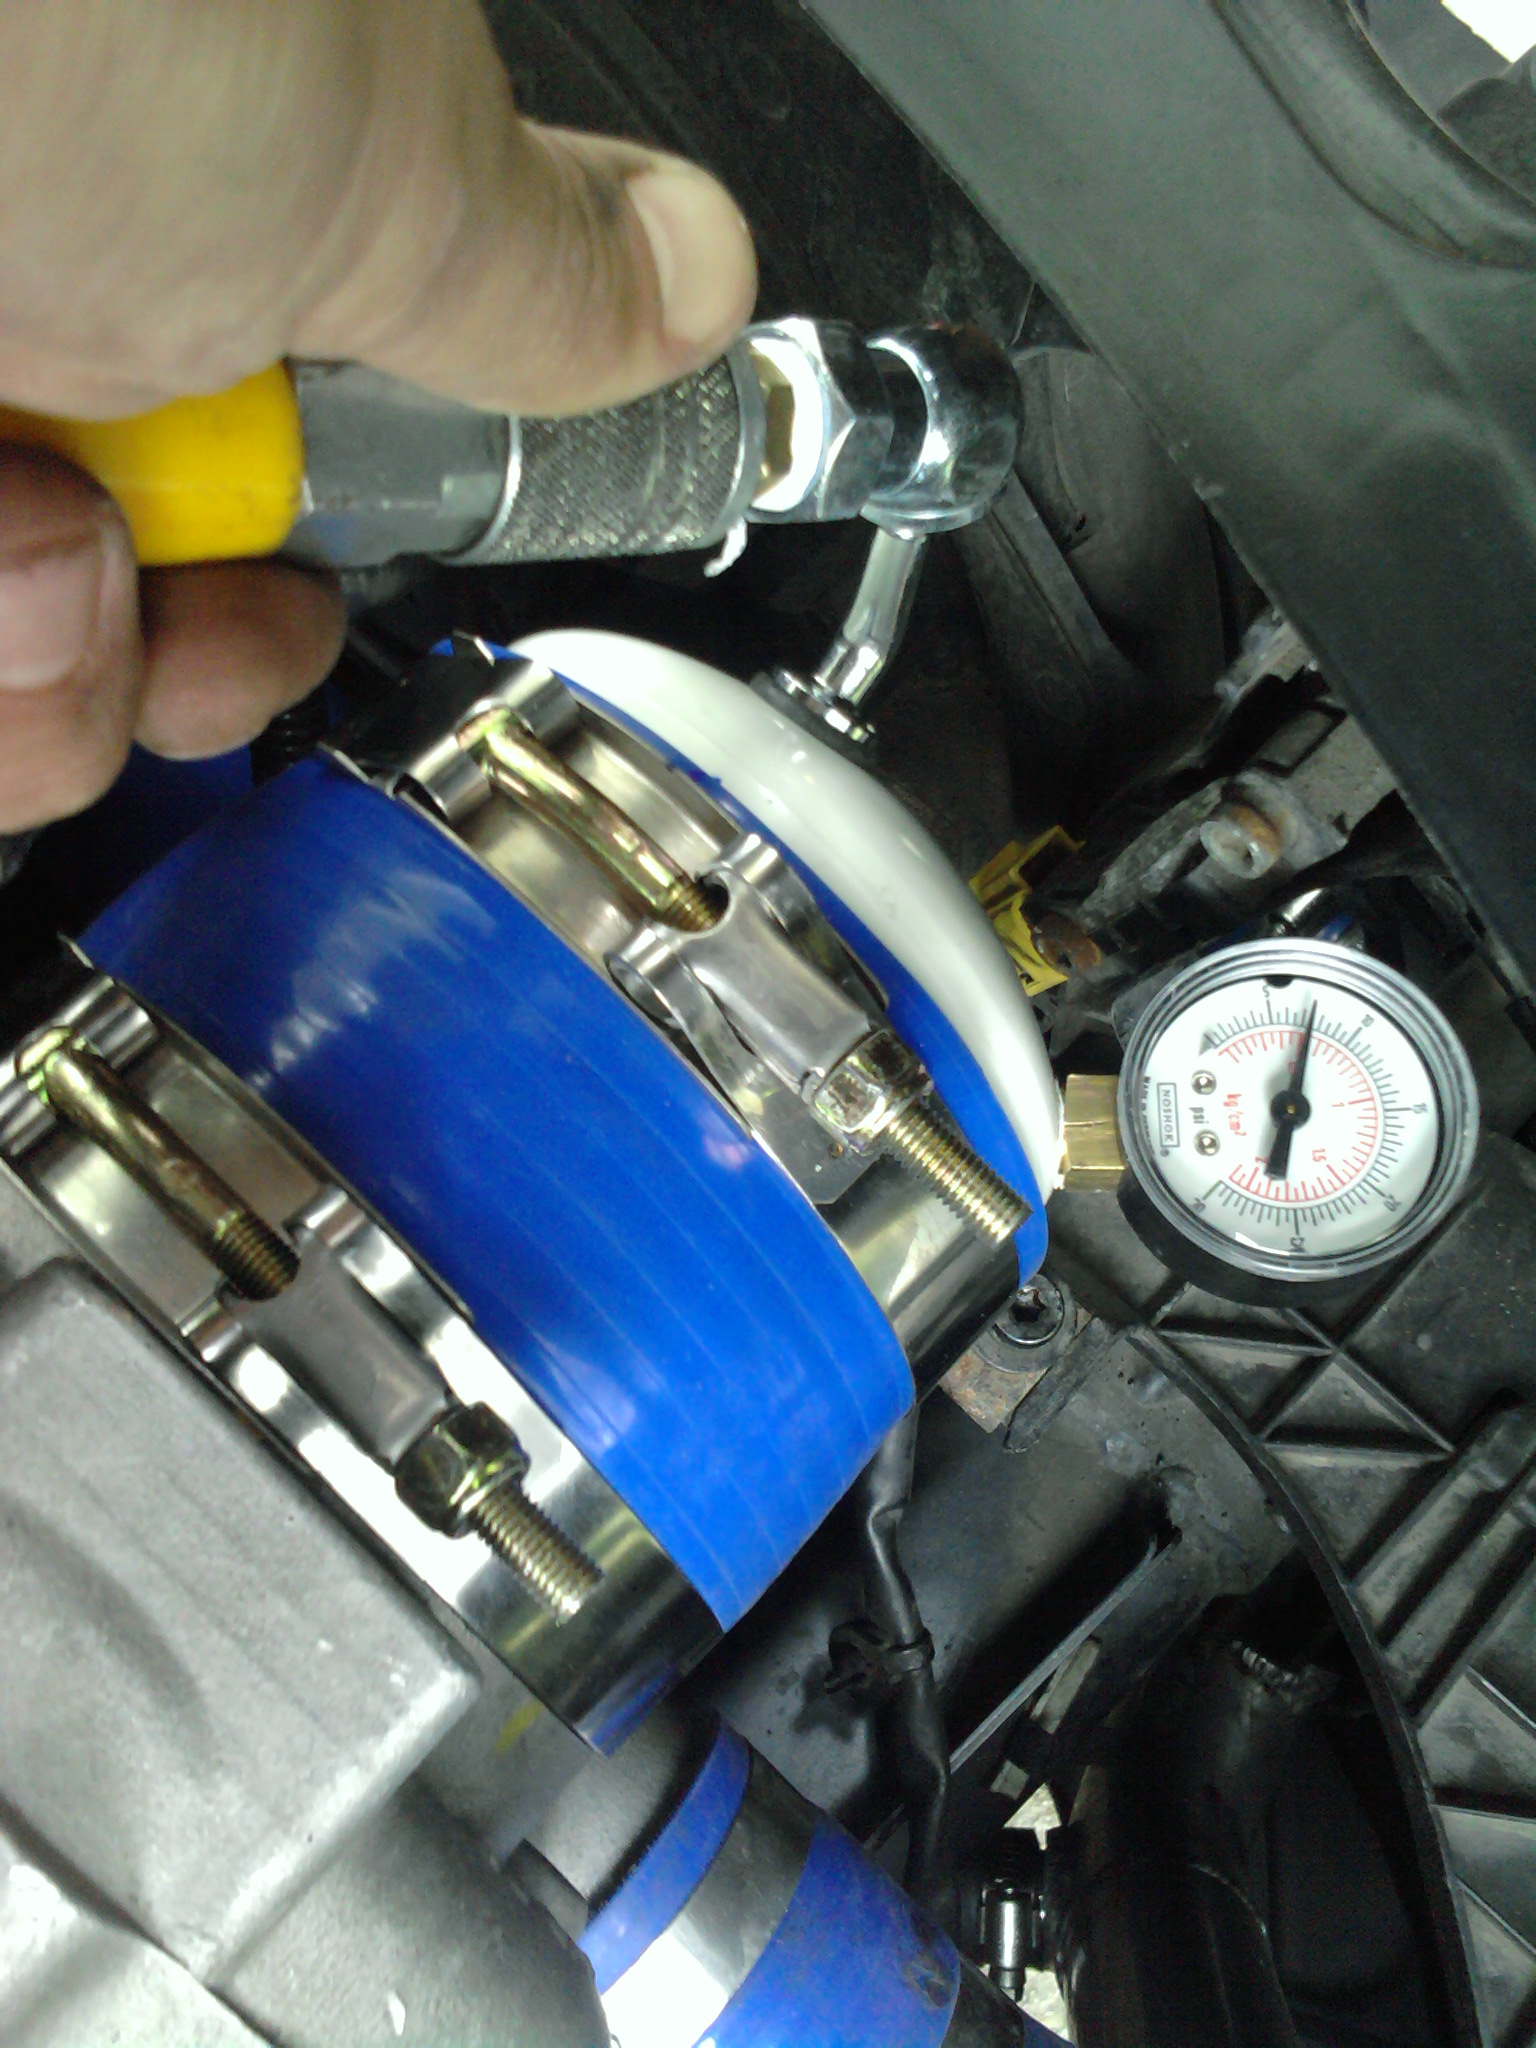
Here you will learn how to properly use your boost leak tester. I will show you how to boost leak test using the Pro-Kit fitted with the tire valve stem and the mounted 0-30 psi boost gauge.
First we need to know some of the basics. You may have some questions like: Why are we boost leak testing? What is the boost leak tester really doing when we hook it up to the engine and pressurize with compressed air?
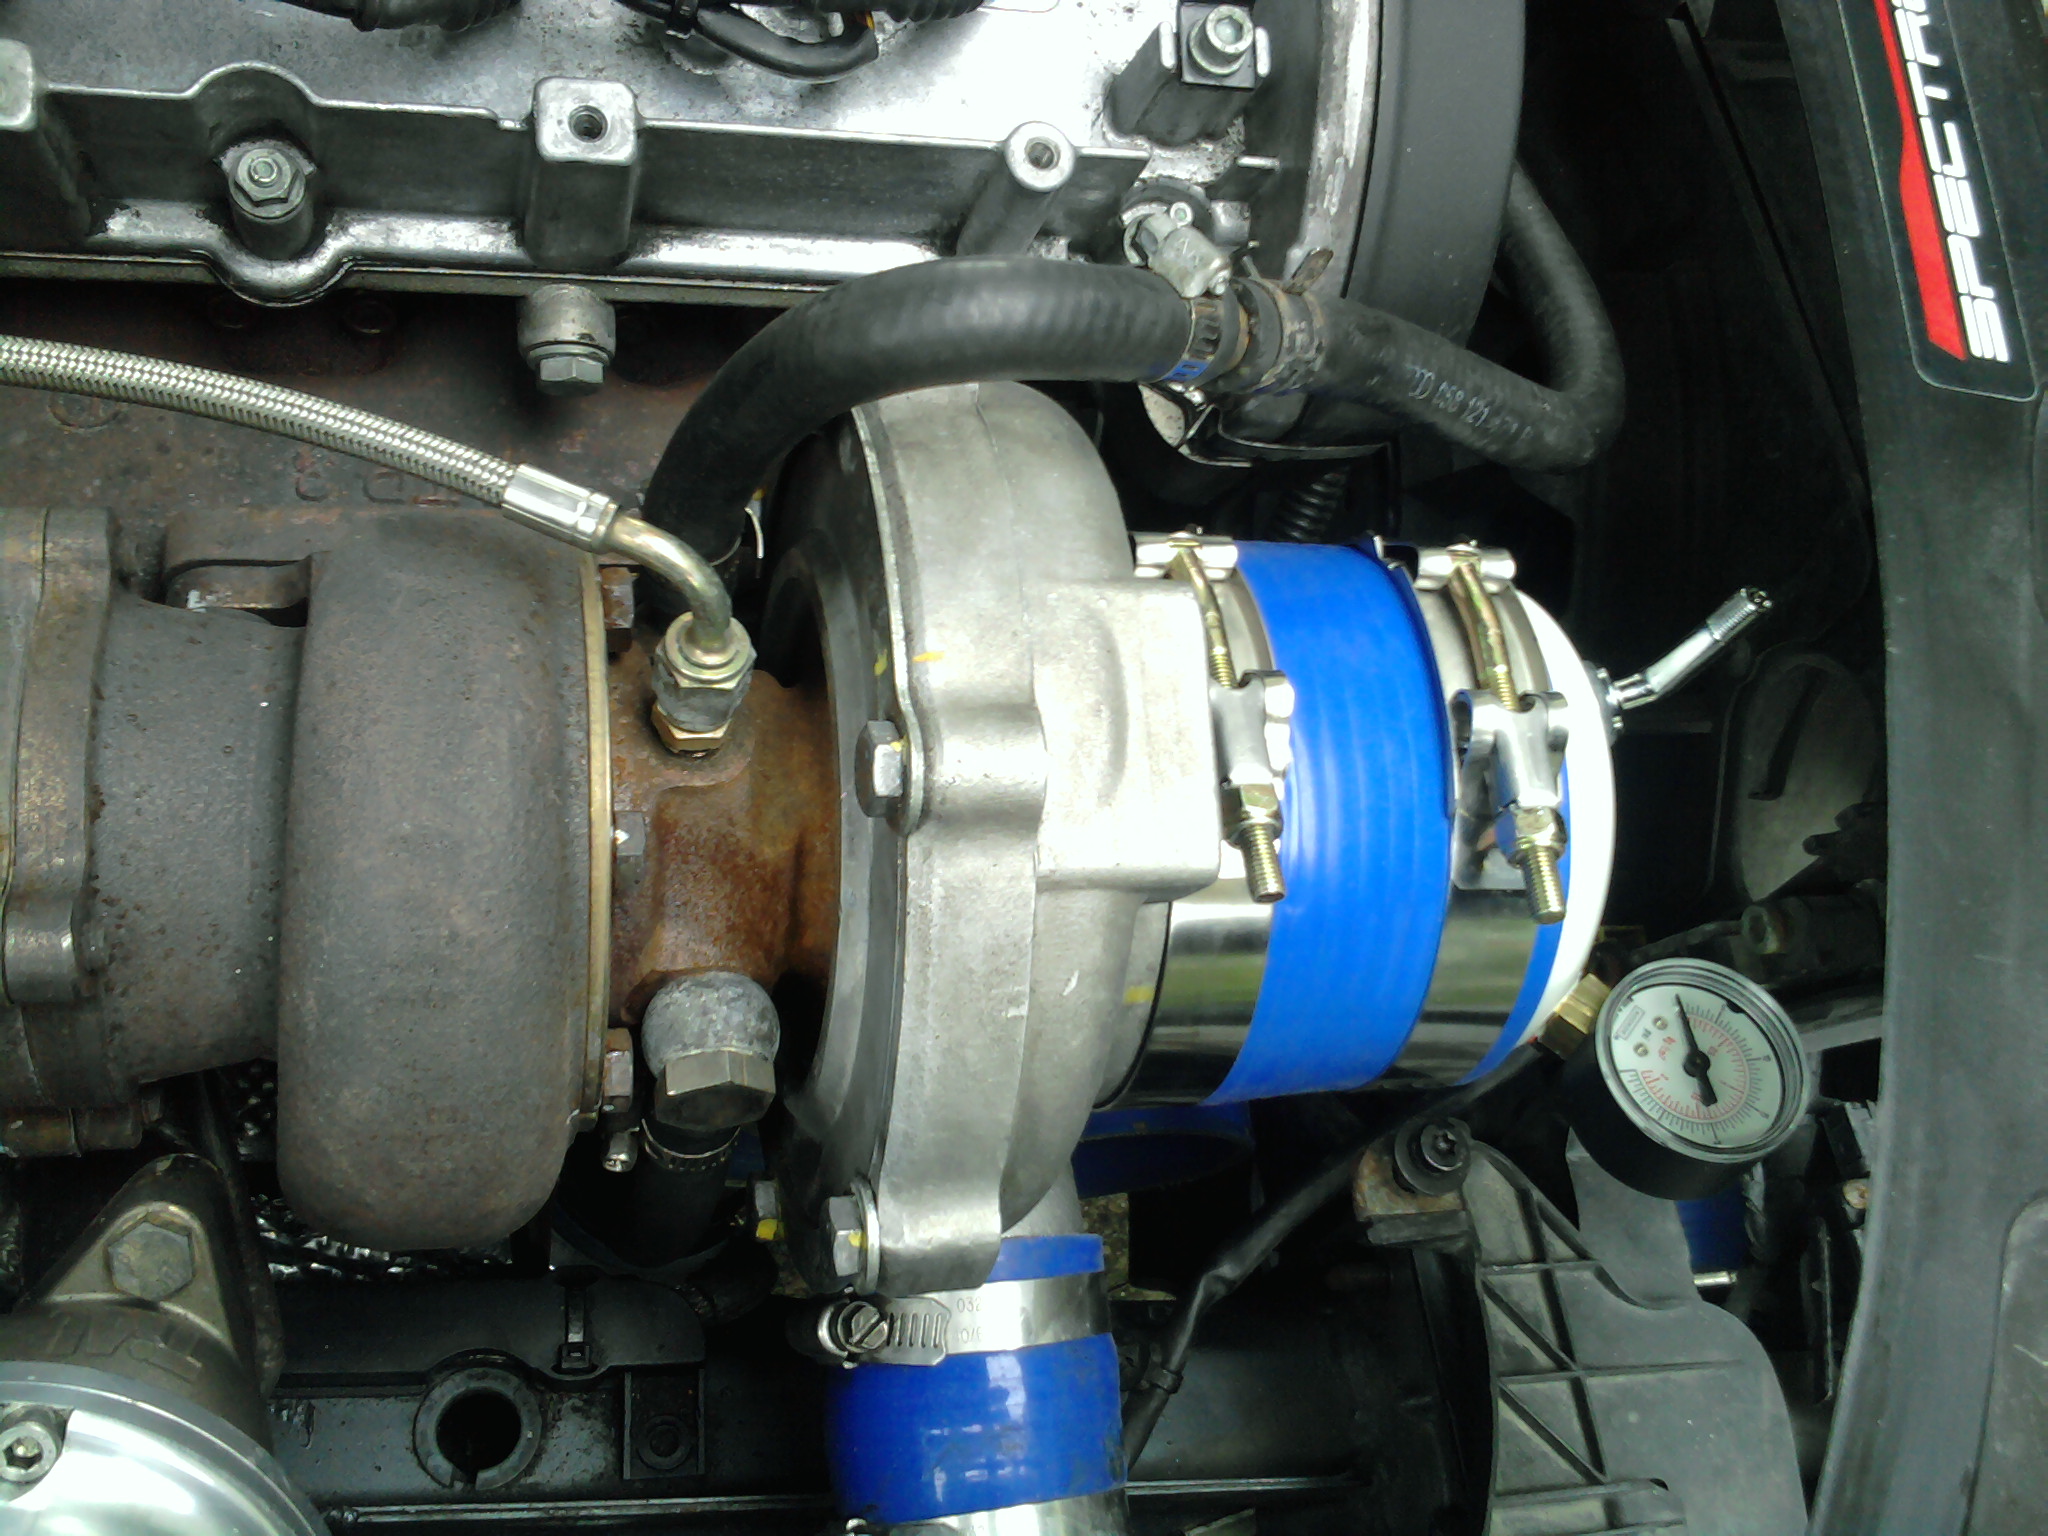
If you look at the pic below, you can see how a typical turbo motor is set up. Even though this is a modified turbo setup, it still gives a good reference and shows the main components of a turbo system that will be pressurized. We can see the turbo charger inlet, outlet, front mount intercooler, blow-off valve, intake pipe, throttle body and intake manifold. All these components basically feed the motor the air it needs when running. And when you are making boost, these components are pressurized with air pressure.
You want to have a rough idea of how much you boost while driving. This is a good target boost to use while pressurizing the system with the boost leak tester. For example if your turbo boosts 12 psi stock, then you don't really want to put more than that while doing the boost leak test.
The motor in the pic was built to handle 30 psi of boost. So before tuning it, I wanted to boost leak test it to make sure there were no leaks. Any good tuner will ask you this before tuning.
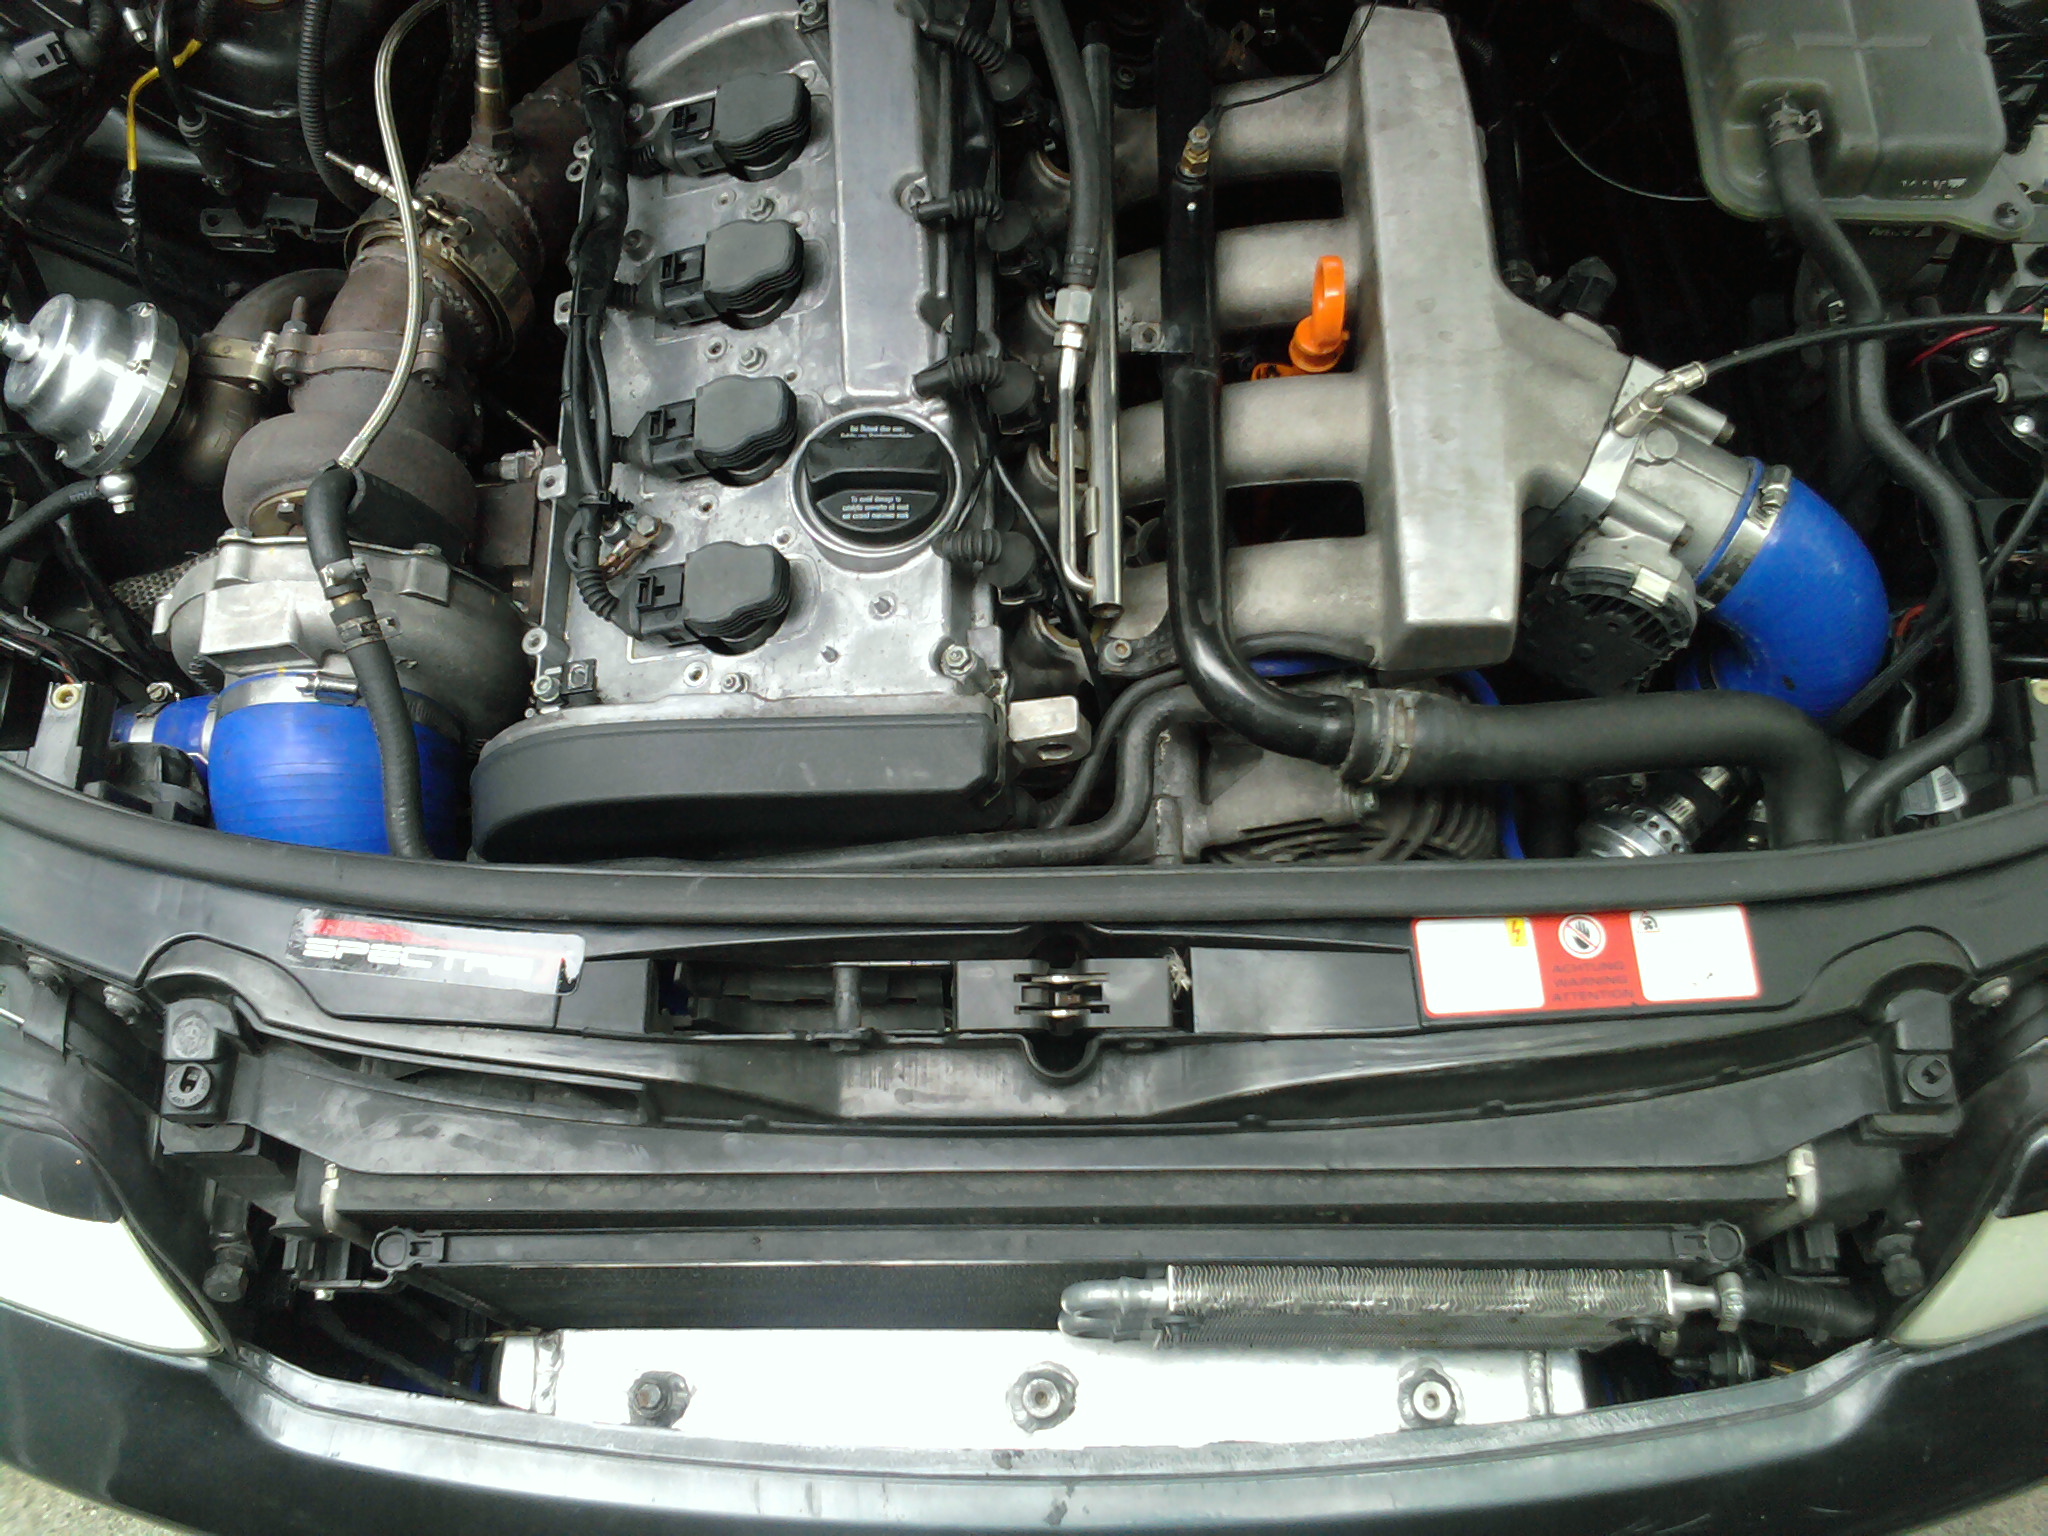
Reference: 2002 Audi A4 built block and stroked to 2.1L, Garret GT3076R turbo with 4" anti-surge compressor housing
Step 1: Access to the Turbo Charger's Compressor Inlet Flange
Remove the turbo intake pipe.
We want to get to the turbo's inlet flange. Don't confuse this with the outlet. You know its the inlet when you can look into it and see the compressor wheel. We are testing at this point because everything after the turbo's inlet normally gets pressurized while the motor is boosting
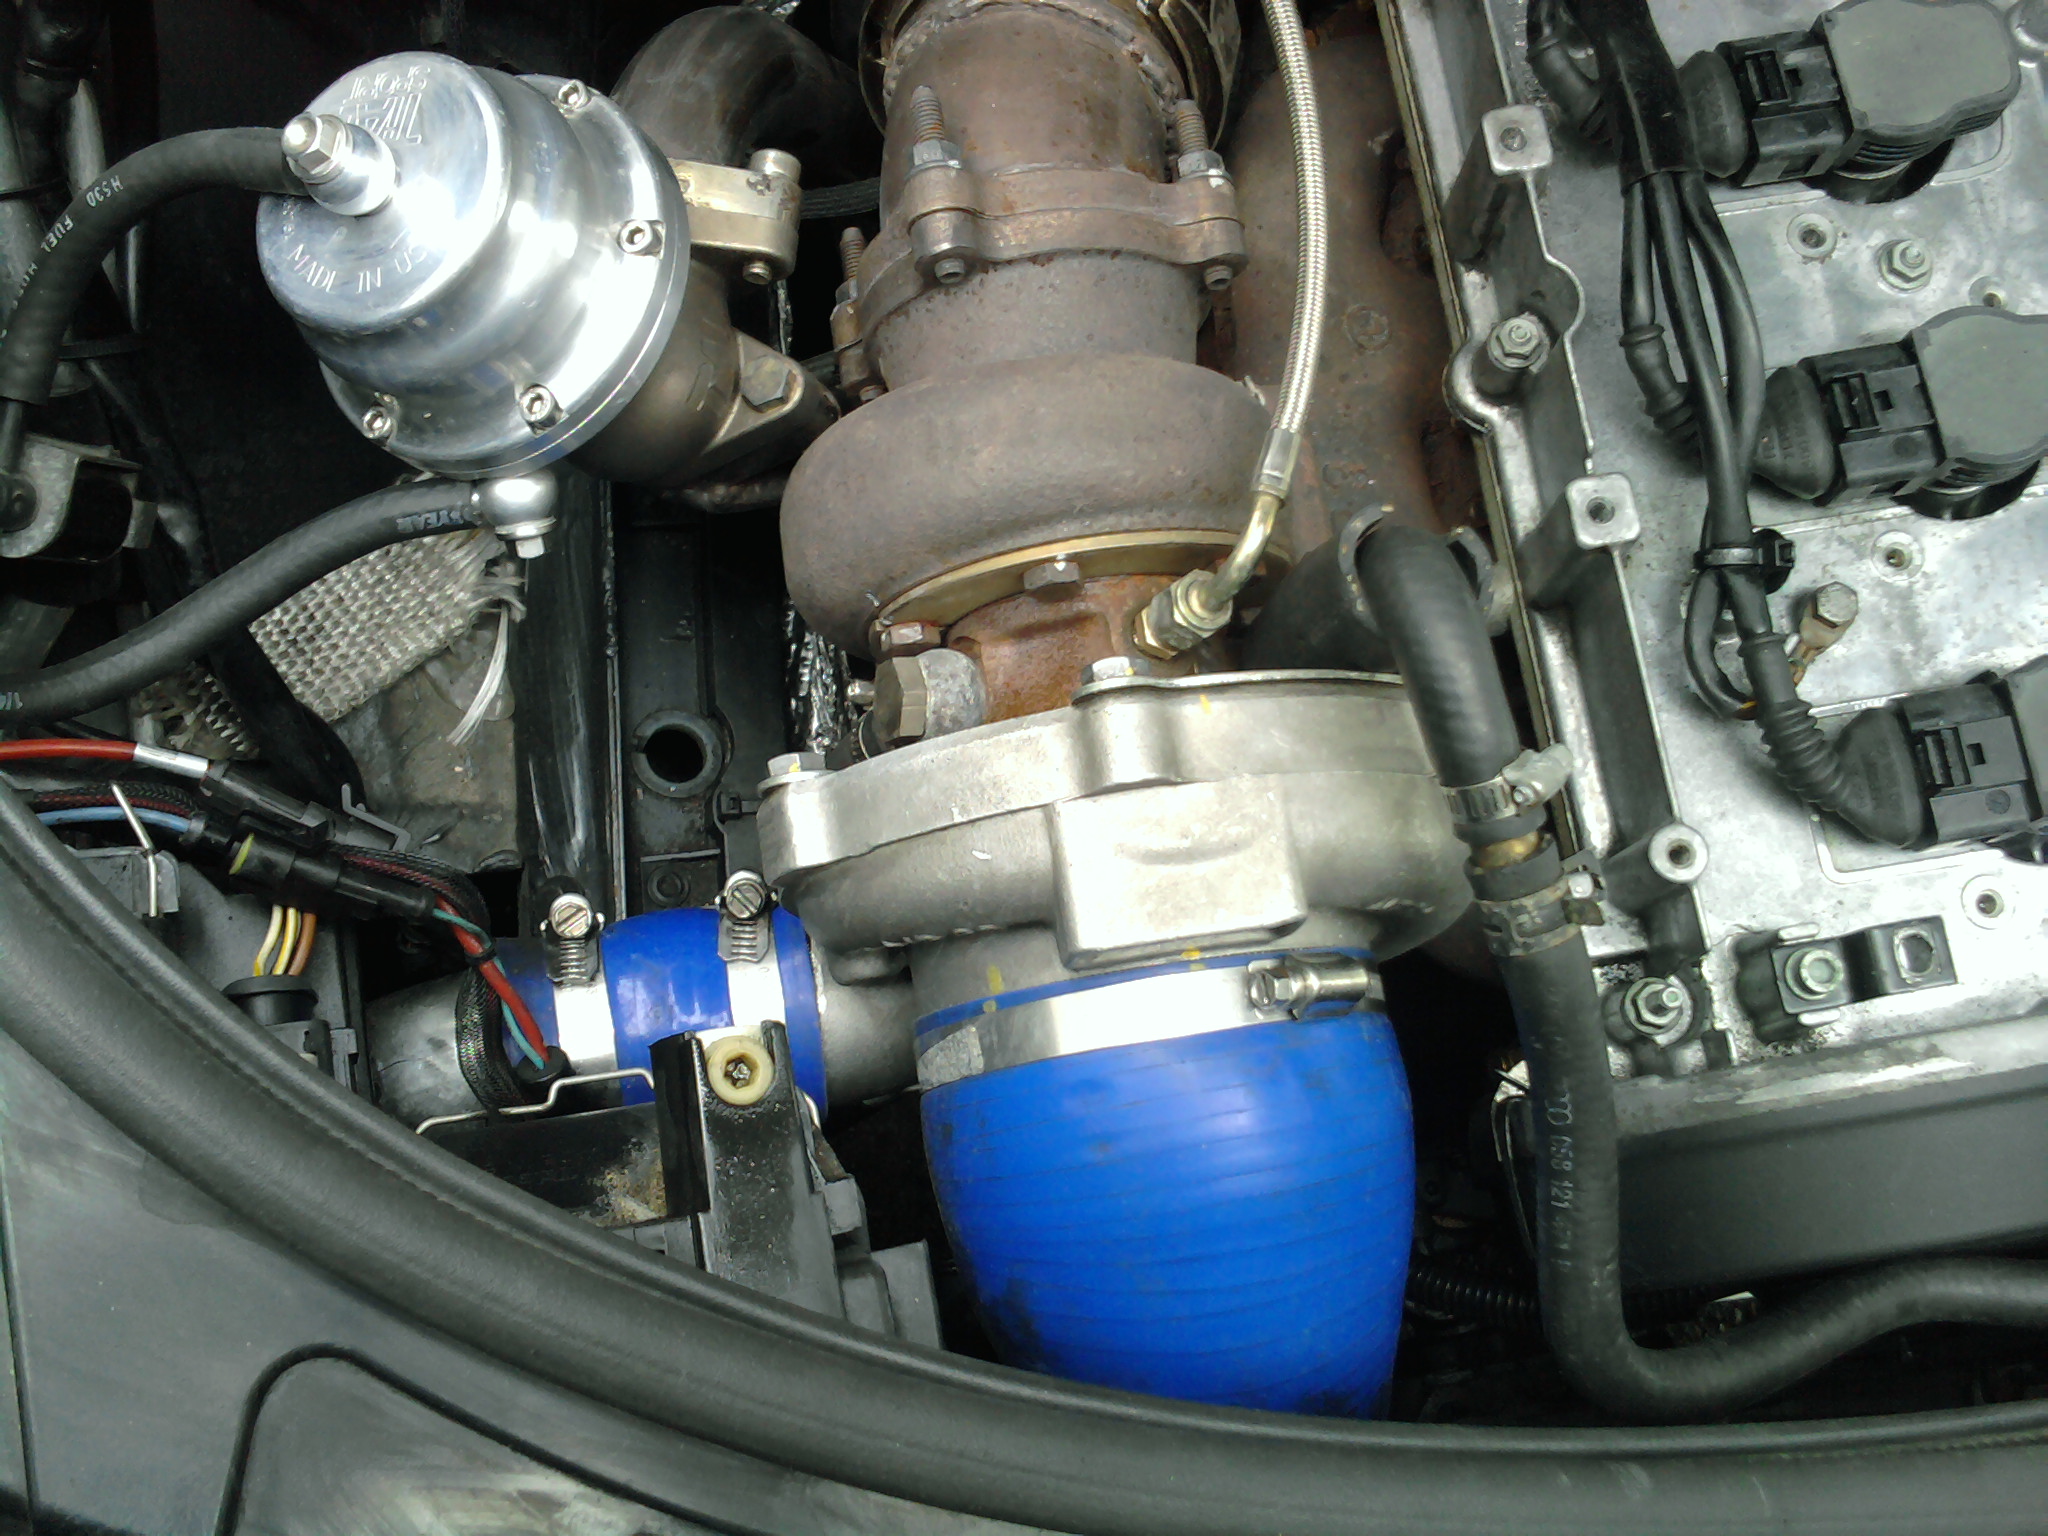
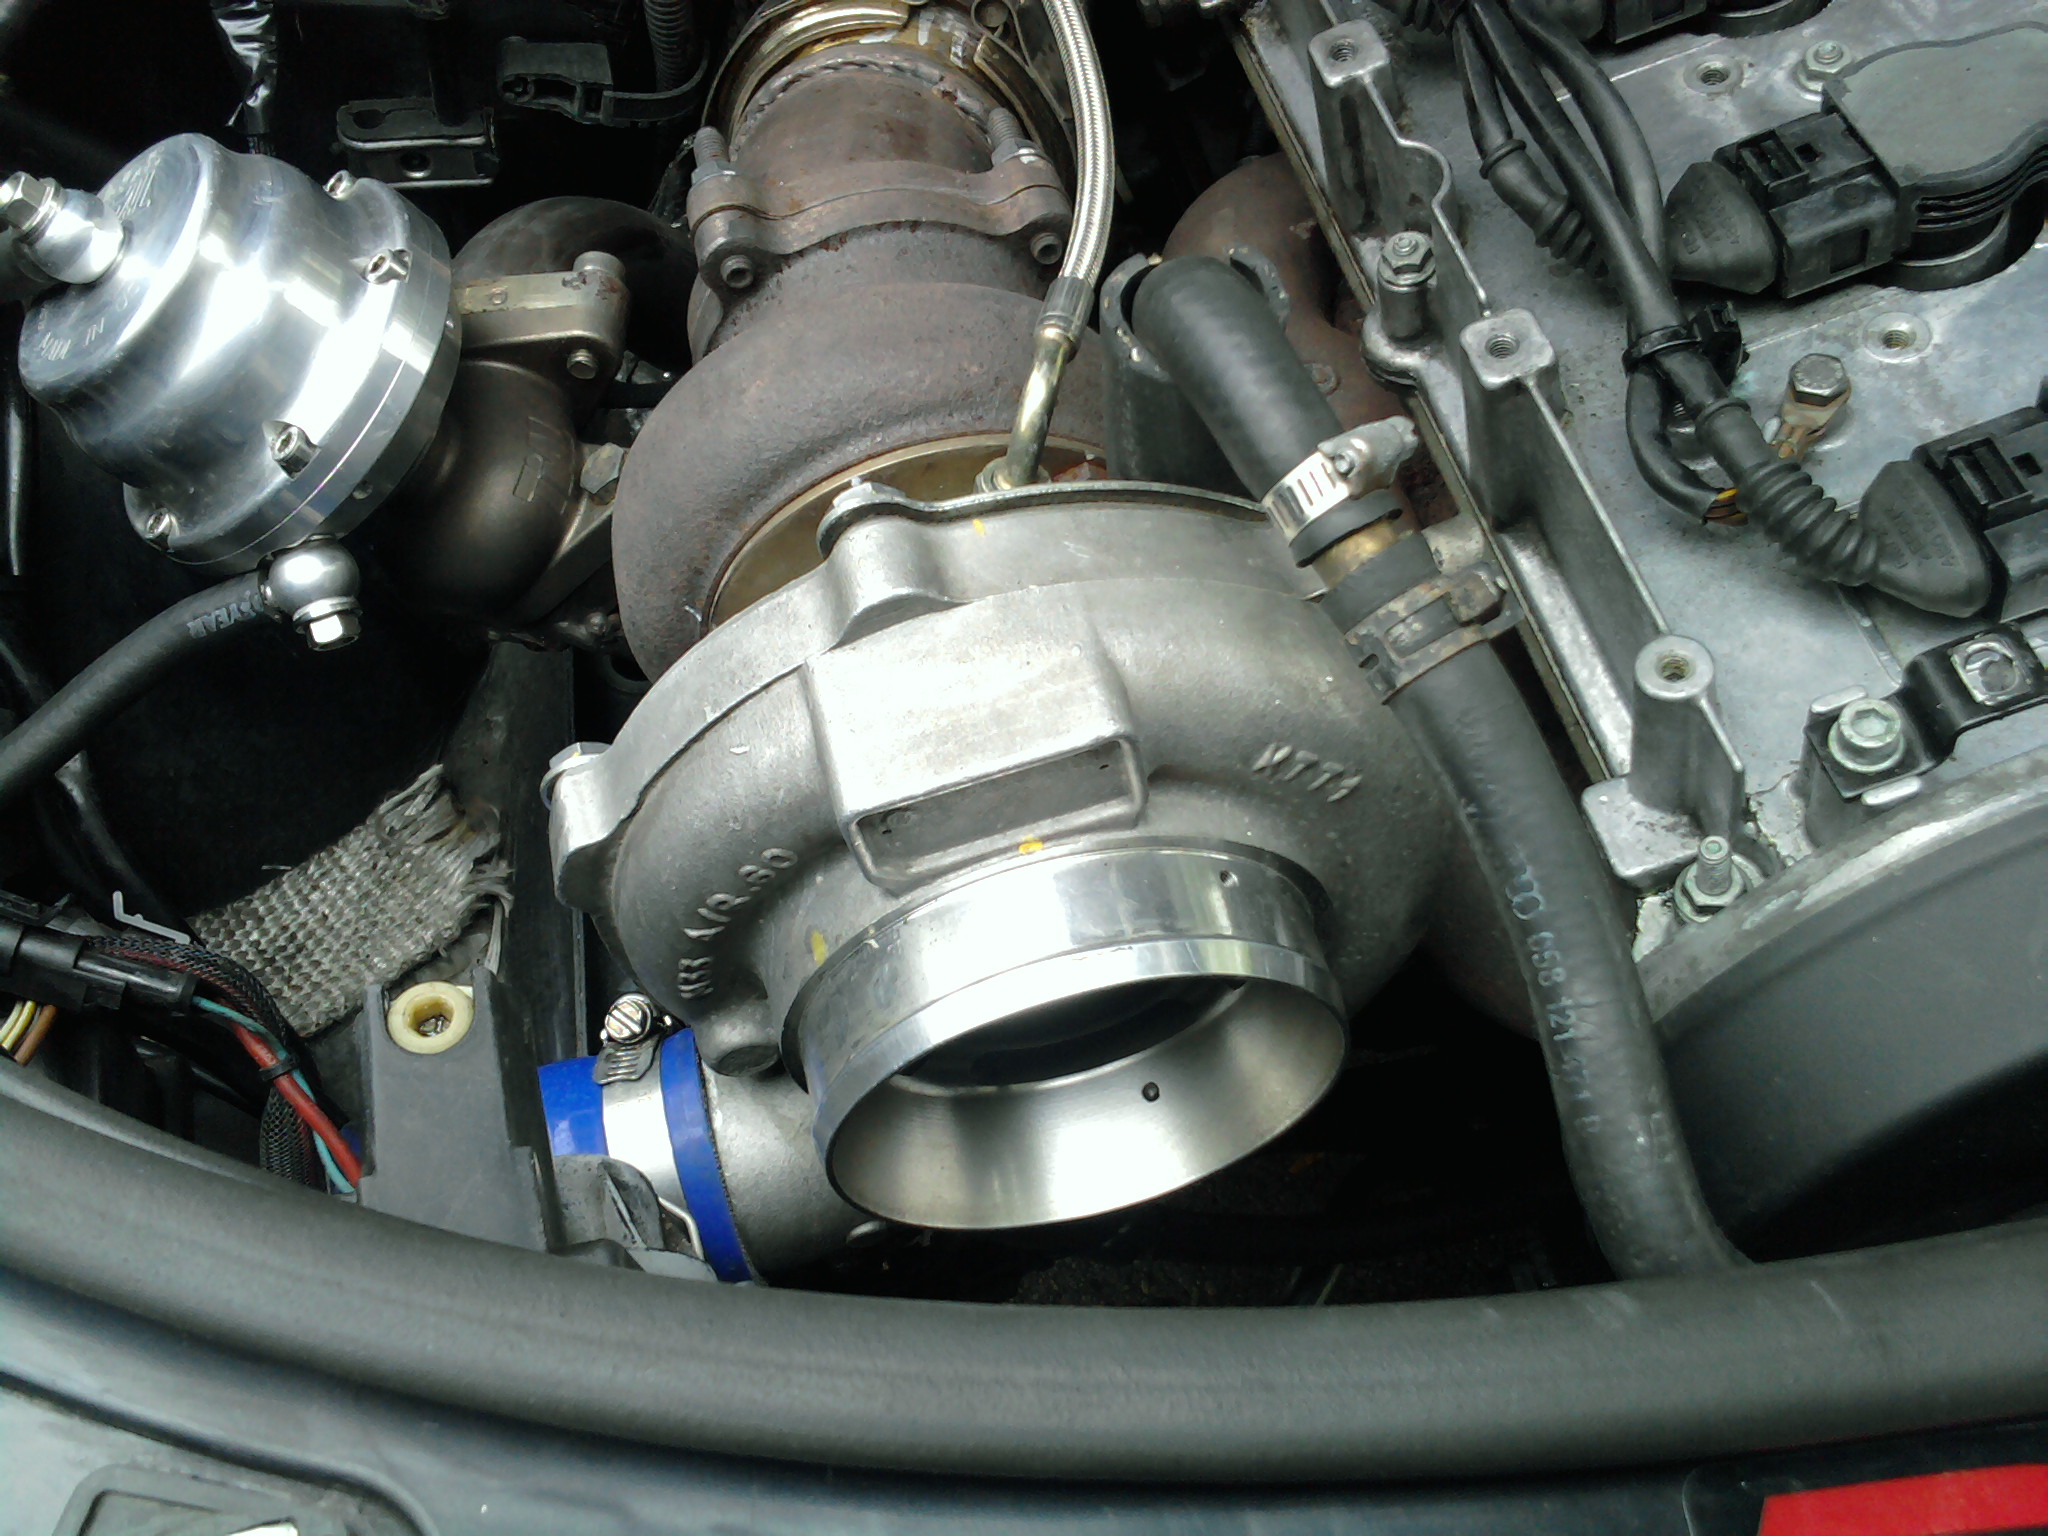
Step 2: Attach the Boost Leak Tester
Secure the boost leak tester to the turbo.
In the pic, the T-bolt clamps are shown. These clamps are highly recommended since they have a higher clamping force and keep the boost leak tester secured under pressure. The t-bolt clamp is optional at check-out otherwise, you will receive a stainless steel worm gear clamp. If you would like an additional clamp to secure the kit to the turbo flange, see the "ACCESSORIES" category to add one to your cart.
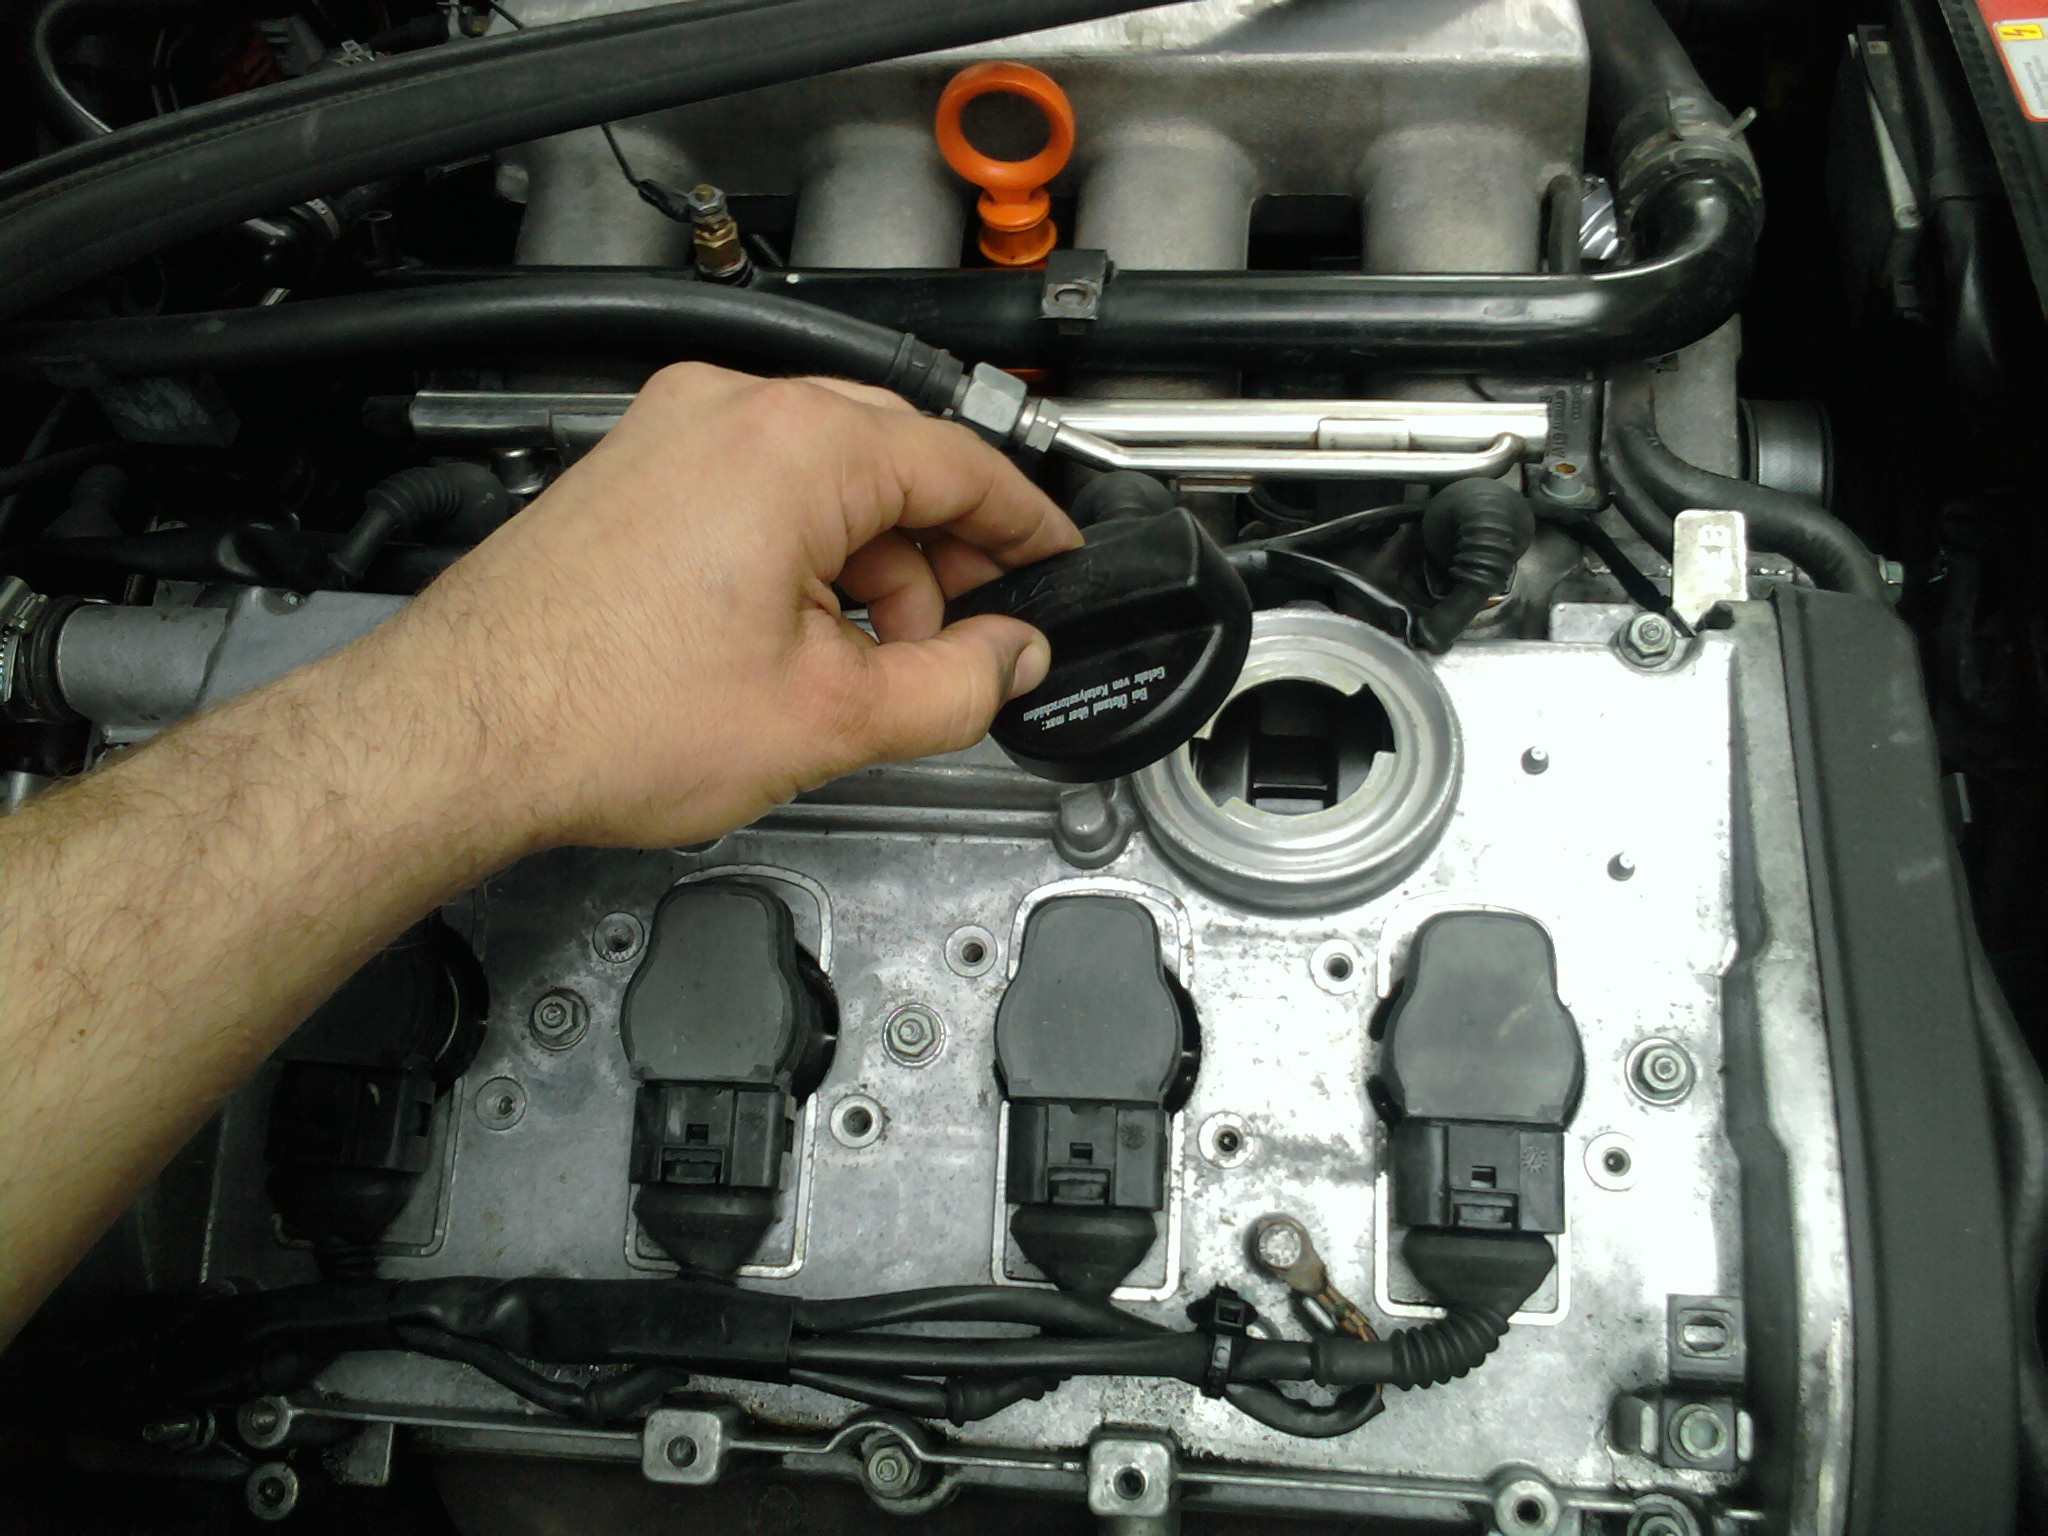
Step 3: Some Engine Safety Precautions - Oil Cap and Set up the Air Compressor
Remove your oil cap. This relieves excess pressure in the crank case system. What does this mean? Well, when you pressurize the system while boost leak testing, some of the air makes it way passed the rings and valve guides and pressurizes the crankcase which can put positive pressure on your crank and cam oil seals. Subarus are especially at risk. Remove the oil cap!
Set up your air compressor - Make sure the outlet pressure is set to a minimum level (on this compressor its the gauge on the right) For our first run to pressurized the system, 5 psi is adequate. Lets see what happens first before cranking up the boost. Hopefully if you are doing your own boost leak test you are familiar with your compressor.
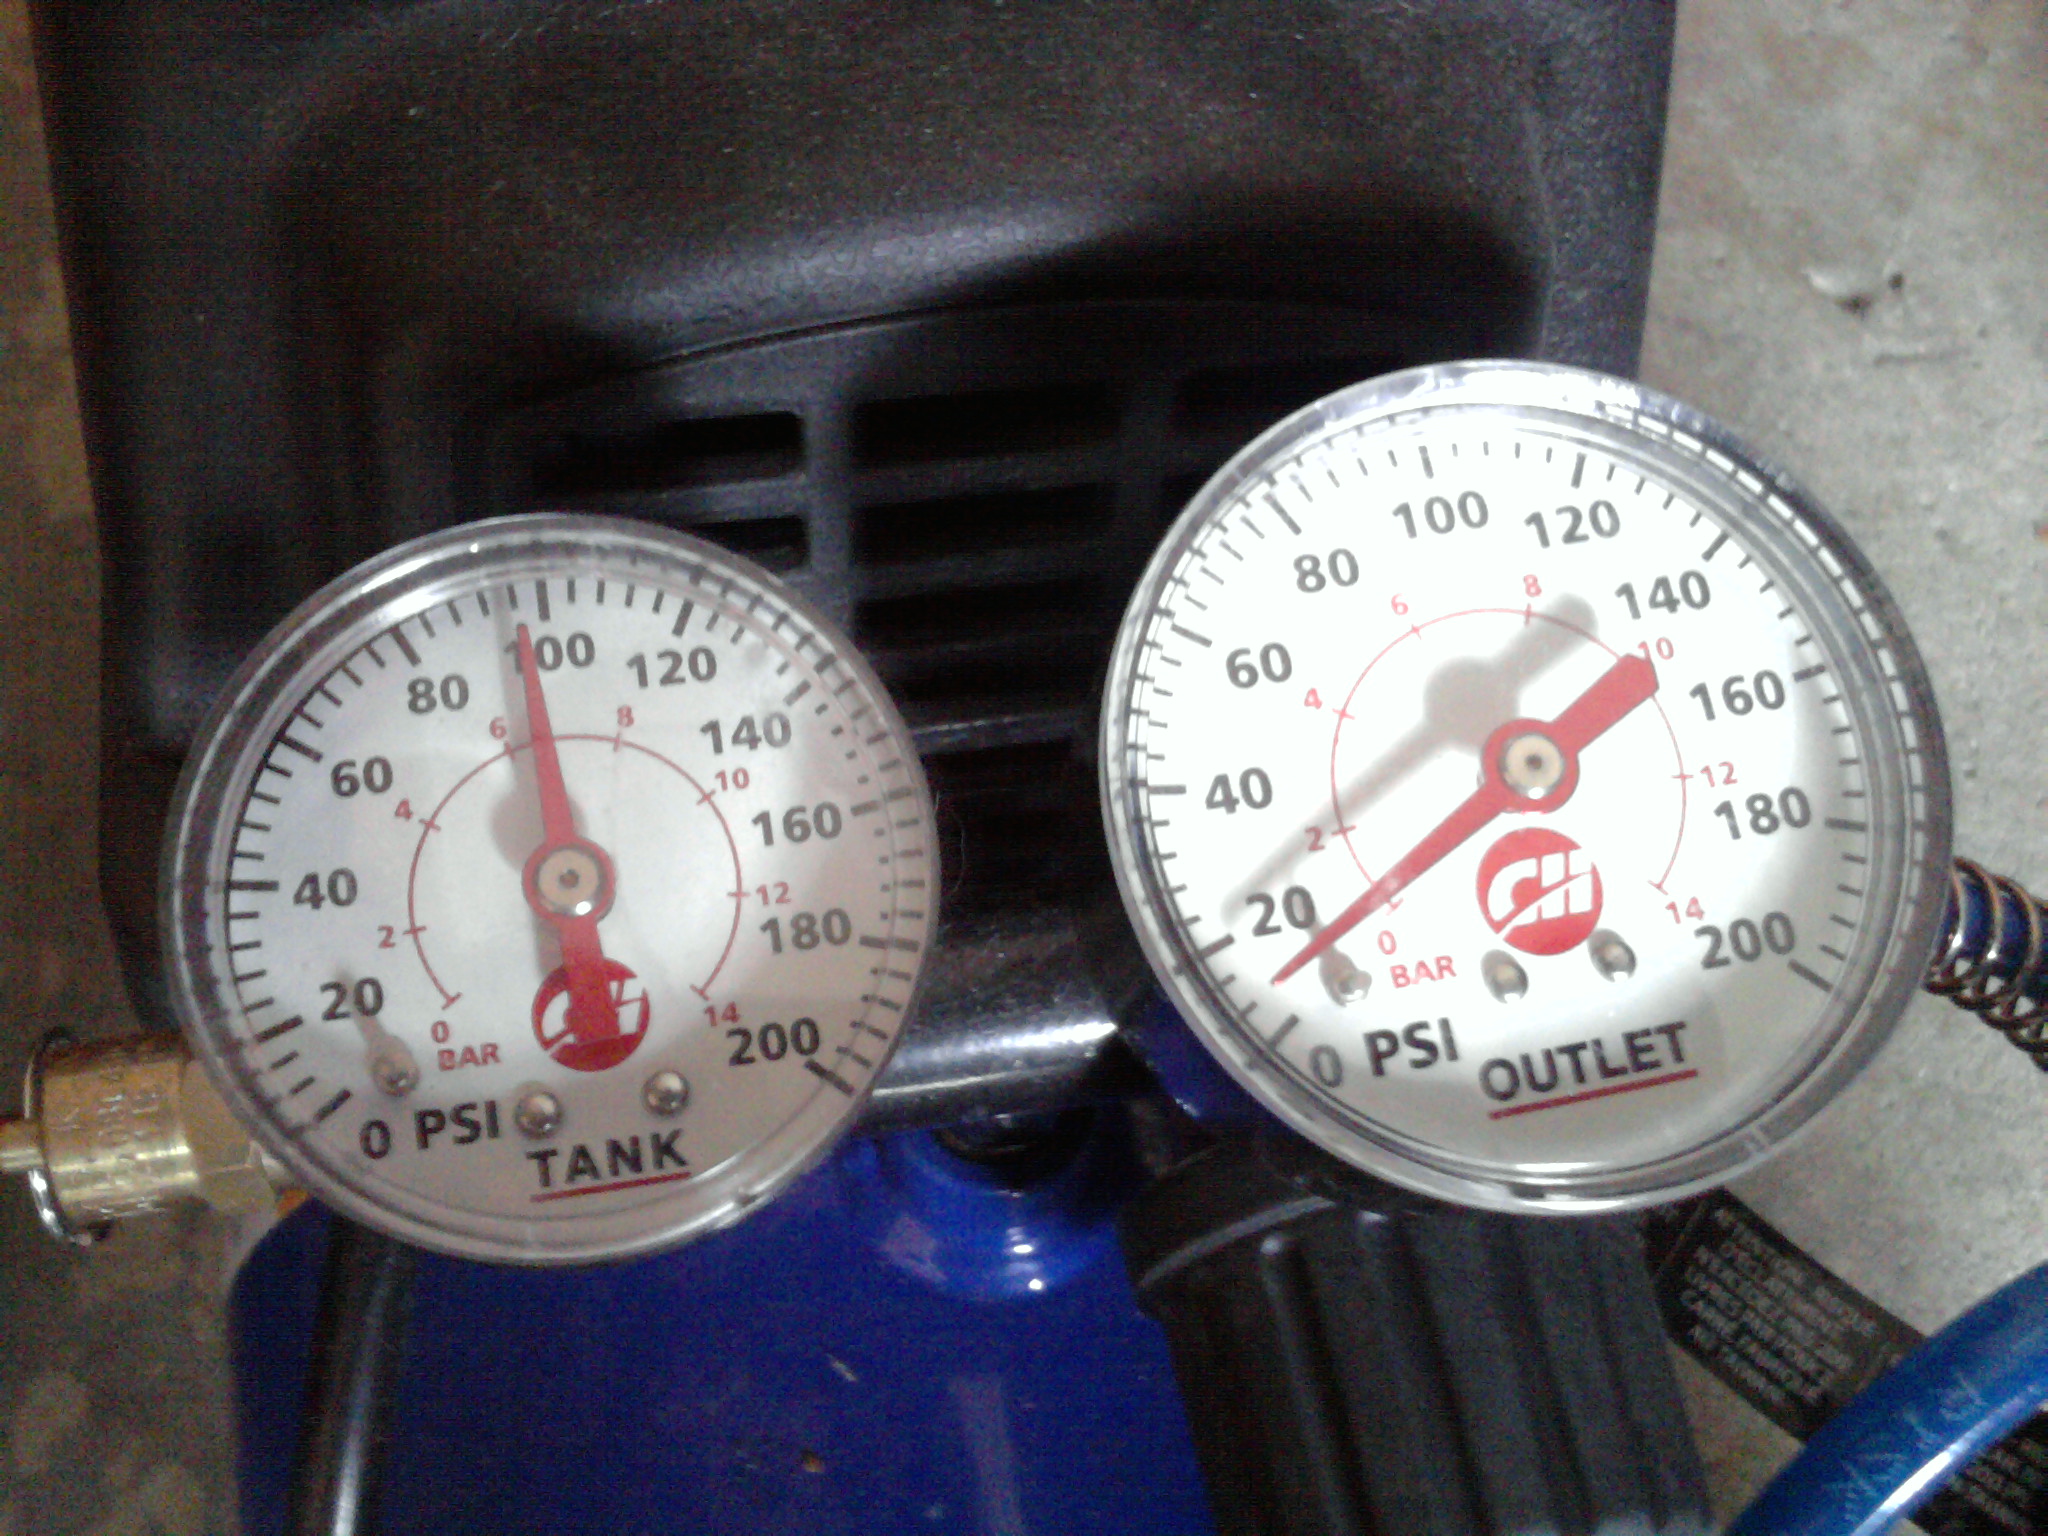
Step 4: Pressurizing the System - Start with a 5 PSI Trial Run
Pressurized the tire valve stem on the boost leak tester using your standard tire inflator attachment (not included). Air pressure will build slowly since our compressor is capped to 5 psi. But this is just a trial run to see if the system will hold any boost at all.
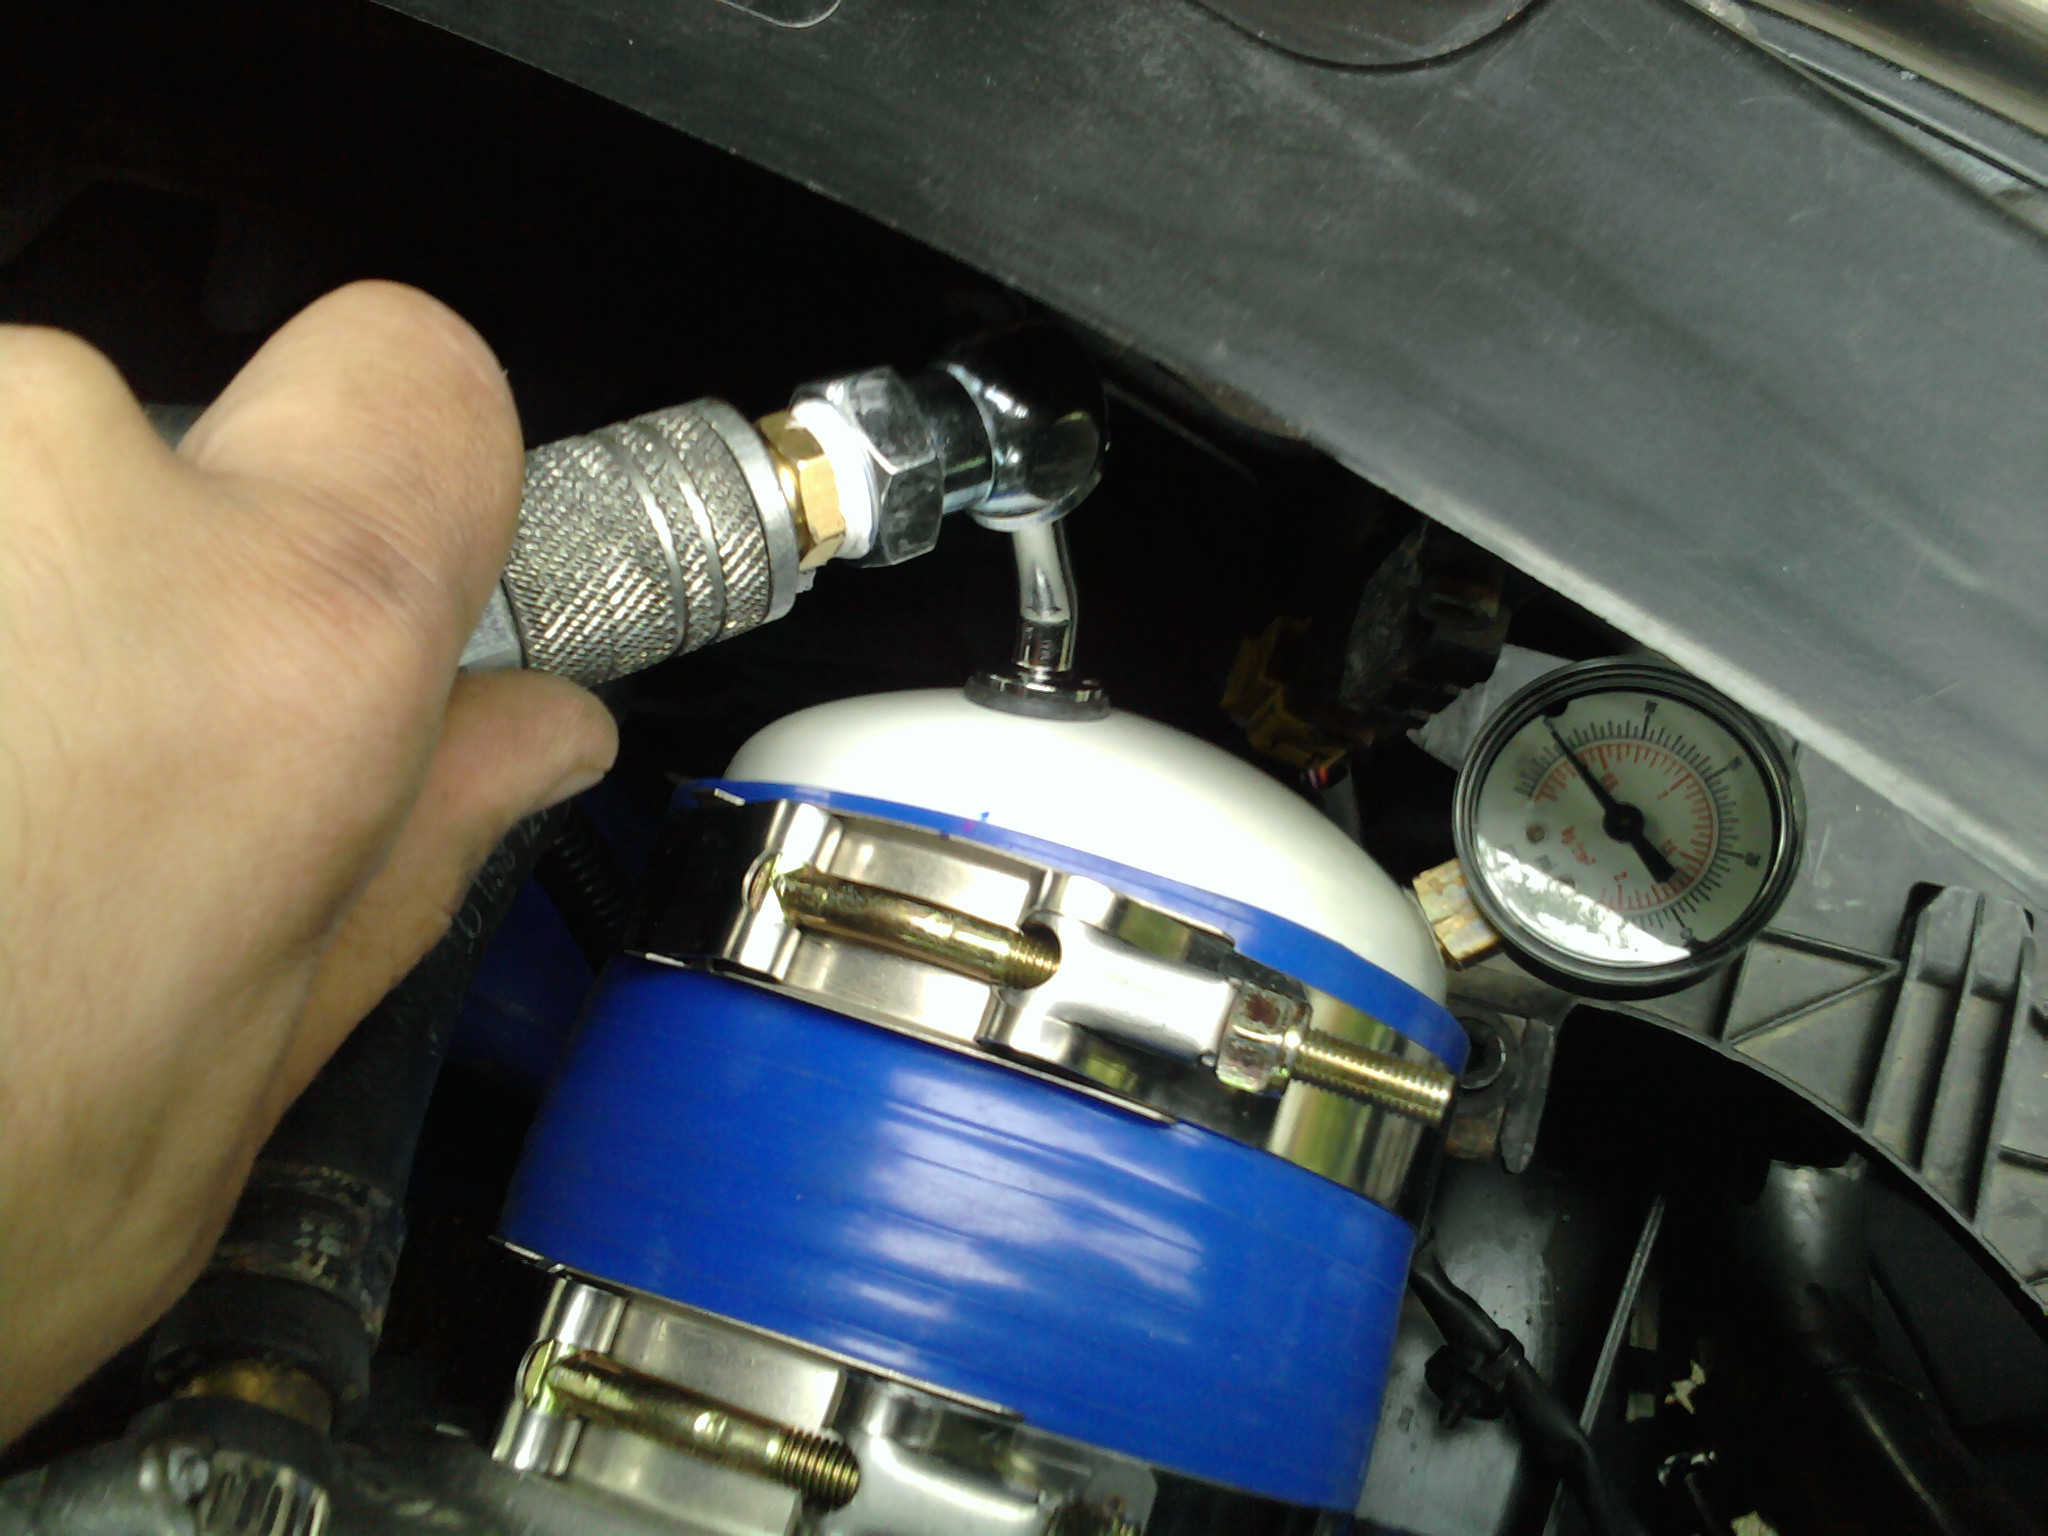
After reaching 5 psi, remove the tire inflator and watch the needle for the rate of pressure loss. Basically, if you lose 1 psi per second (1psi/s), then your system is in good shape.
Can't make pressure in the system? ...
If you cannot build any pressure or are struggling to make the 5 psi, then you have a large boost leak. While pressurizing the system, listen for leaks. It might help to have a friend do this while you inspect the lines. Feel around and locate the leak. It also helps to do this while it is quiet.
Sometimes you will not hear a distinct "leak" sound, for example, like air leaking from a tire. This means you might have forgotten to pinch of a crank case line (if testing before the turbo at an intake pipe) or you left a line large line disconnected, or you have a huge boost leak! On my boost leak test for this write-up I had accidentally left my blow off valve disconnected when removing the intake. When pressurizing the system I couldn't build any pressure. Shortly after i realized my oversight and reconnected the blow off valve.
After you are successfully able to pressure test with 5 psi, you can safely move on to a higher test pressure.
Step 5: Pressurizing the System - Using higher pressure
Now that we confirmed we can build pressure in the previous step, we can move up to a higher pressure. In this case I used 12 psi as my intermediate pressure level.
Same scenario here as in the previous step; Listen for leaks while pressurizing, keep your eye on the needle and keep the air inflator on the boost leak tester until the 12 psi is reached, remove the tire inflator and watch the needle for the rate of pressure loss. Watch for the 1 psi/s. With more pressure in the system, you will lose psi faster.
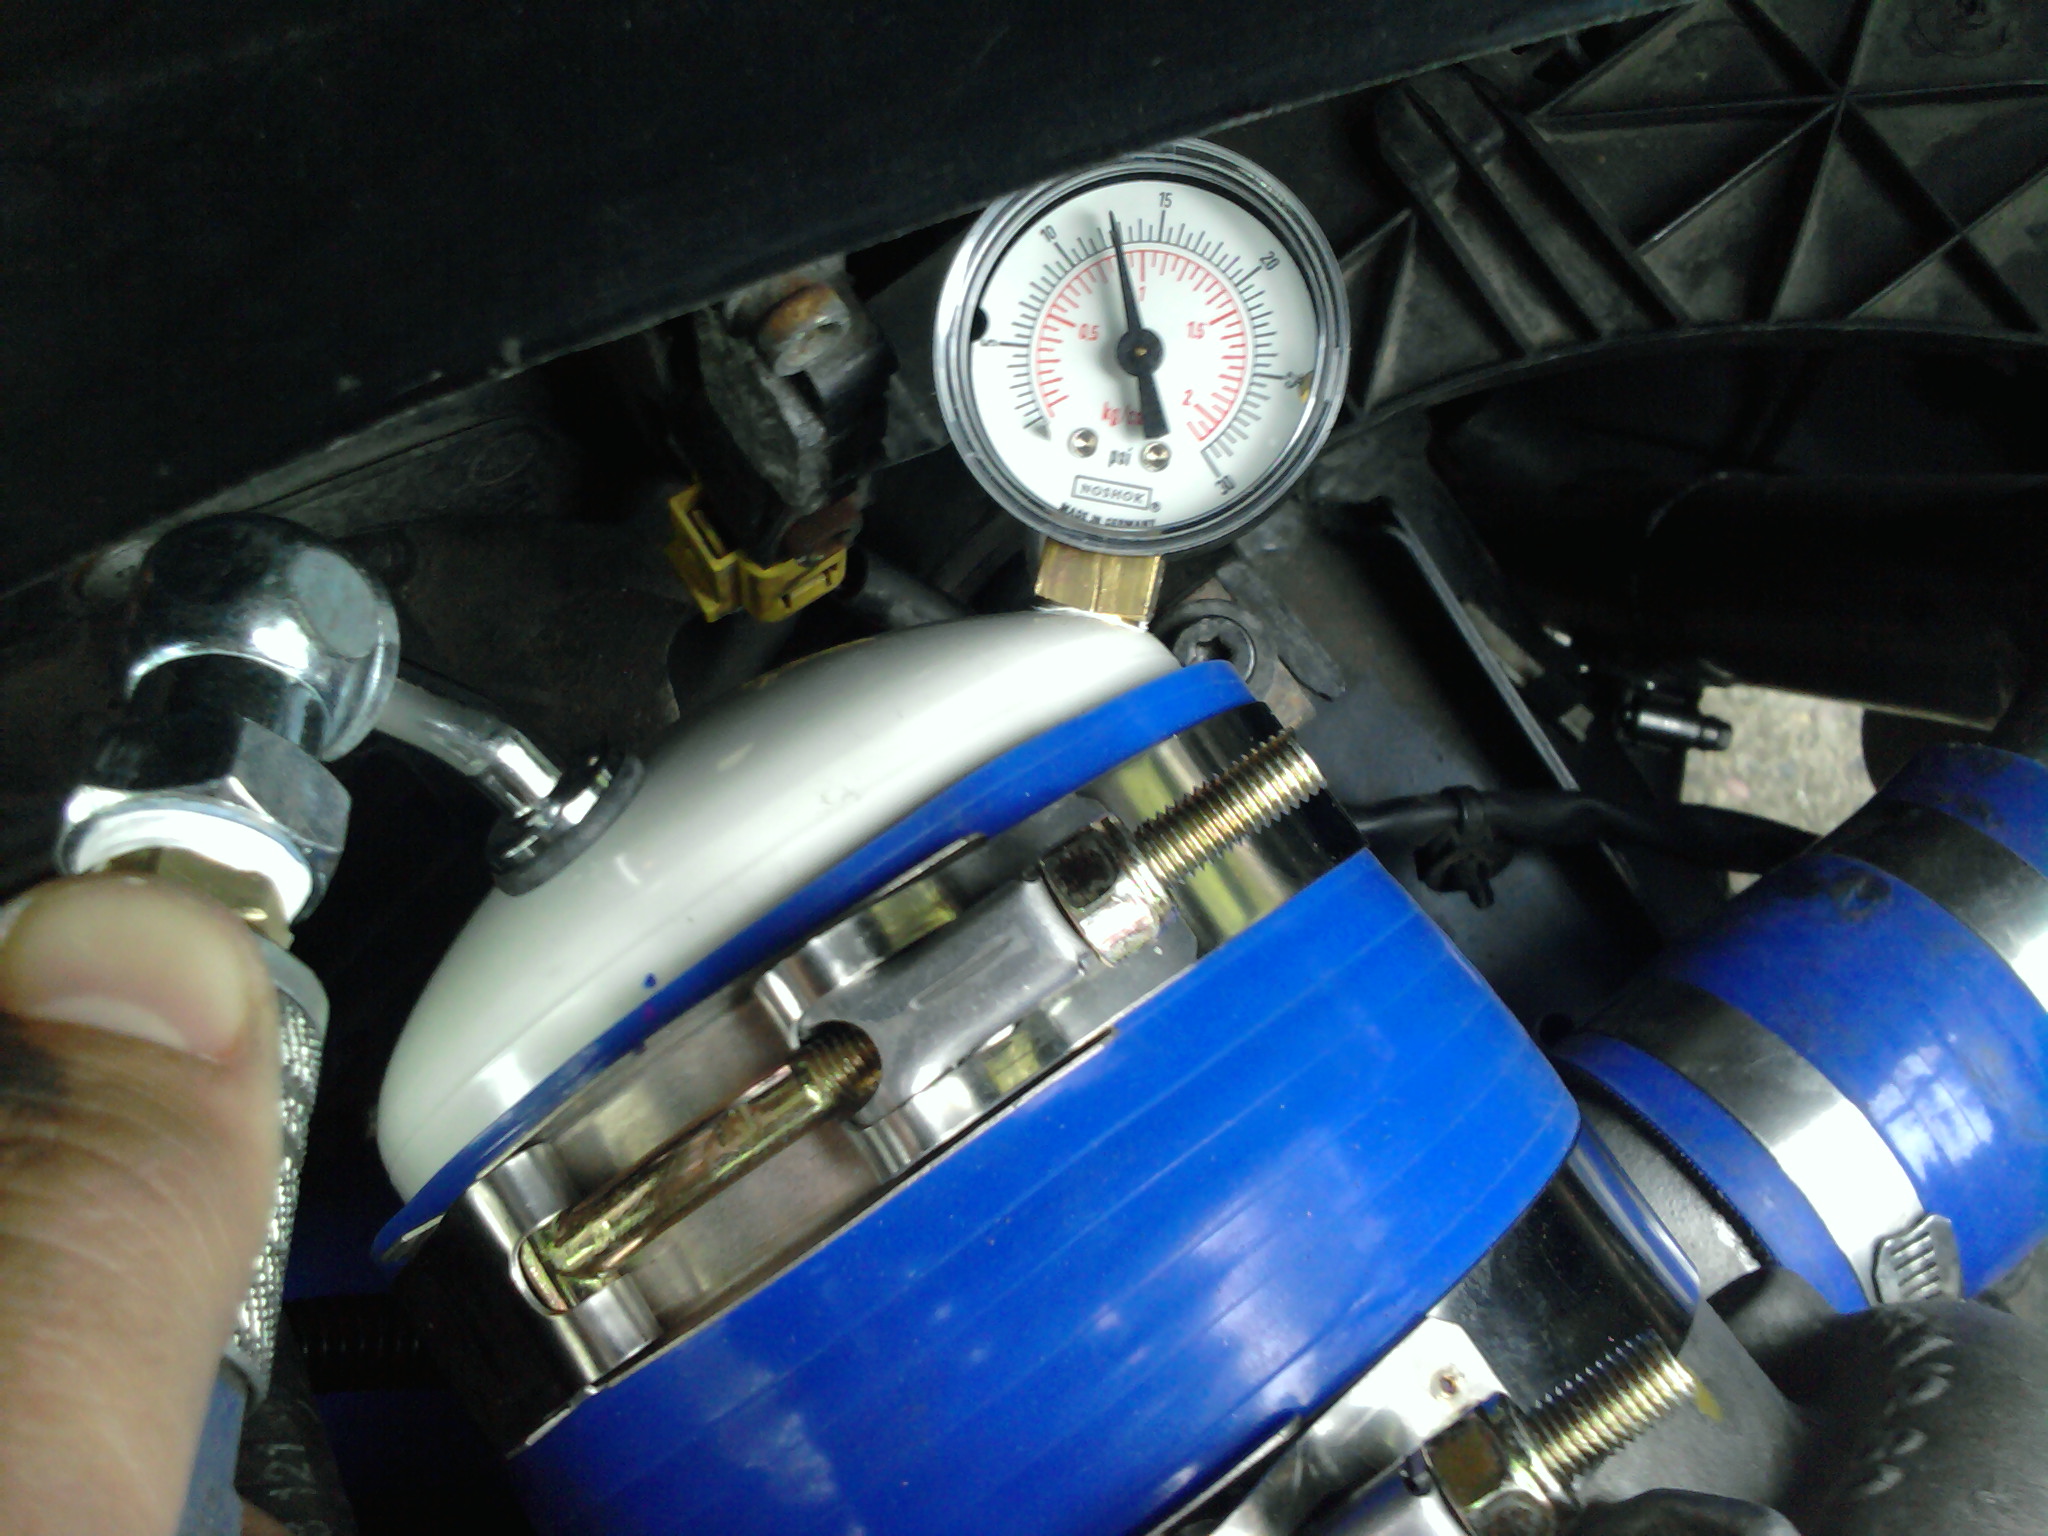
Hopefully now you get the idea. Fix your leaks, re-test. If you dont hear anything and your rate of pressure loss is healthy then you are all set.
